Fixtures
1. How to Add a Tag to a Project in Wringr
To add a tag to a project in Wringr, follow these steps:
Navigate to Your Project
- On the Wringr platform, go to the Projects section in the left navigation panel.
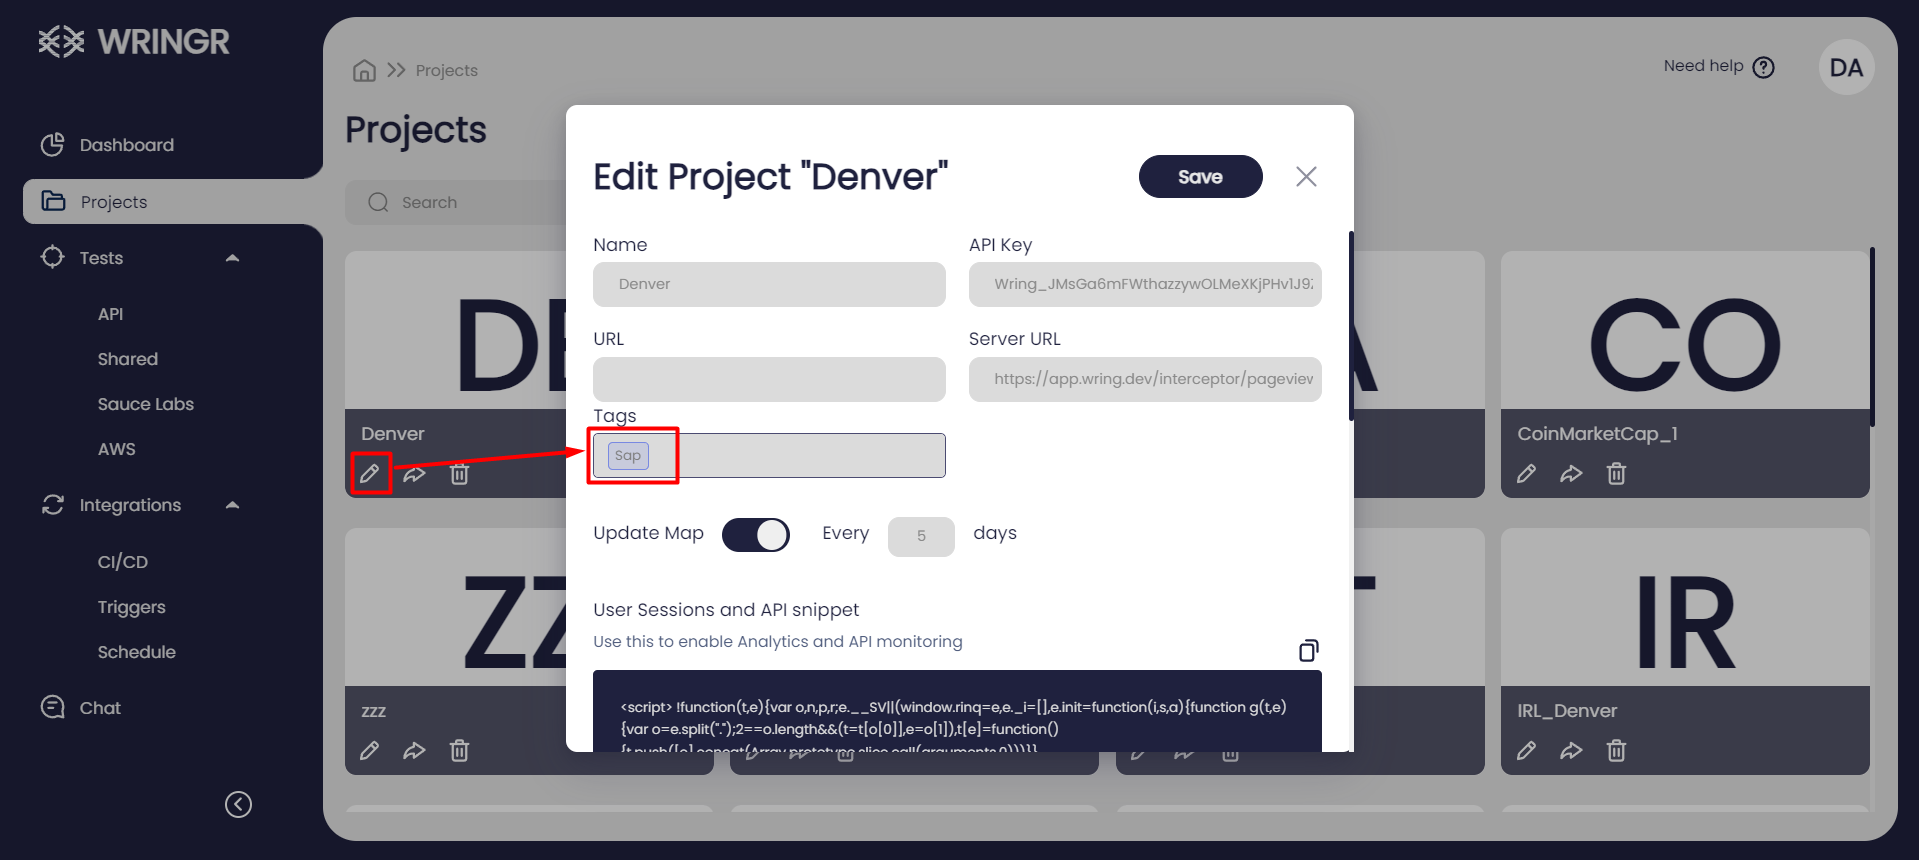
- Find the project you want to edit, such as "Denver".
Edit the Project
- Click the pencil icon next to the project name to open the project settings.
Add a Tag
- In the Edit Project dialog that appears, find the Tags field.
- Enter the desired tag (e.g., "Sap") into the Tags field.
Save Your Changes
- Click the Save button at the top right of the dialog to apply the changes.

4. How to Add a Fixture in Wringr
A fixture allows tests to run with an initial setup. An example fixture would be a login to application step.
To add a fixture in Wringr, follow these steps:
Go to Steps
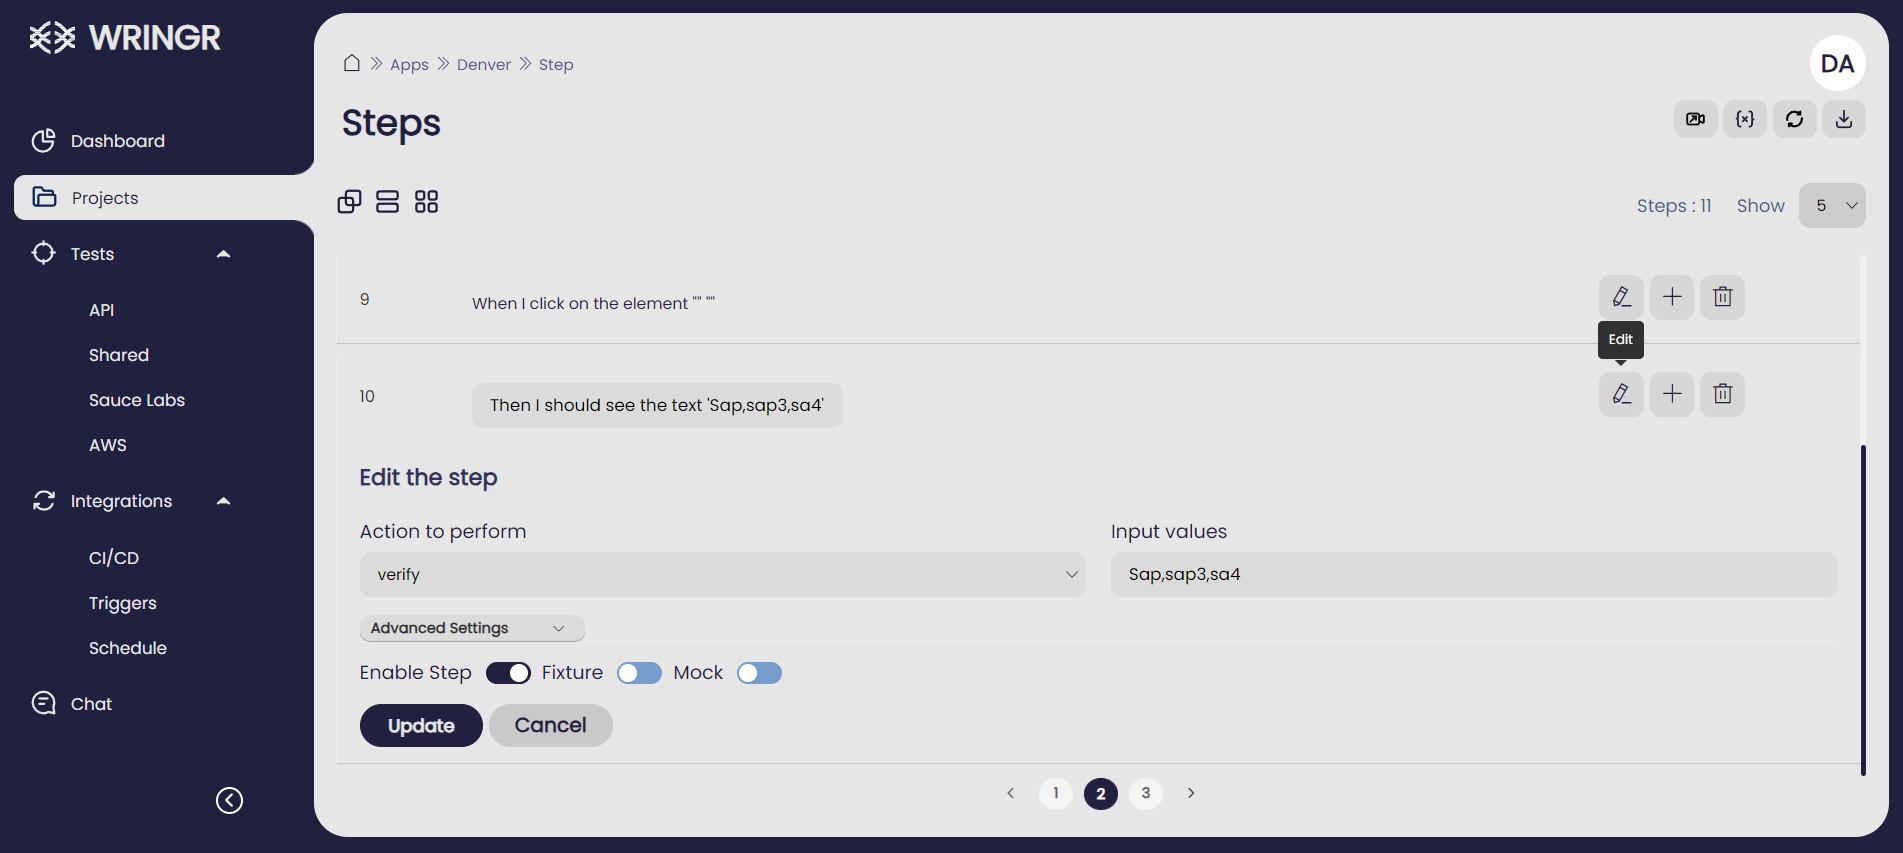
- Click on the Steps section for your project to view the list of steps.
Edit the Step
- Find the step you want to edit and click the pencil icon next to it to open the editing options.
Add the Fixture
- In the Edit the step panel that appears, find the Enable Step option.
- Toggle the Fixture switch to enable it.
- Make any additional changes if needed.
Save Your Changes
- Click the Update button to save your changes.
