User Sessions
Uploading Recorded Sessions to Wringr
After recording a user session using the "Recorder" in Chrome DevTools (learn more about how to do this here), you can upload the session to your project on the Wringr platform for further analysis and testing.
Steps to Upload a Session:
Navigate to Your Project:
- Once you're logged into Wringr, go to the "Projects" section and select the project to which you want to upload your session. This will take you to the project’s dashboard, where you can manage all related sessions.
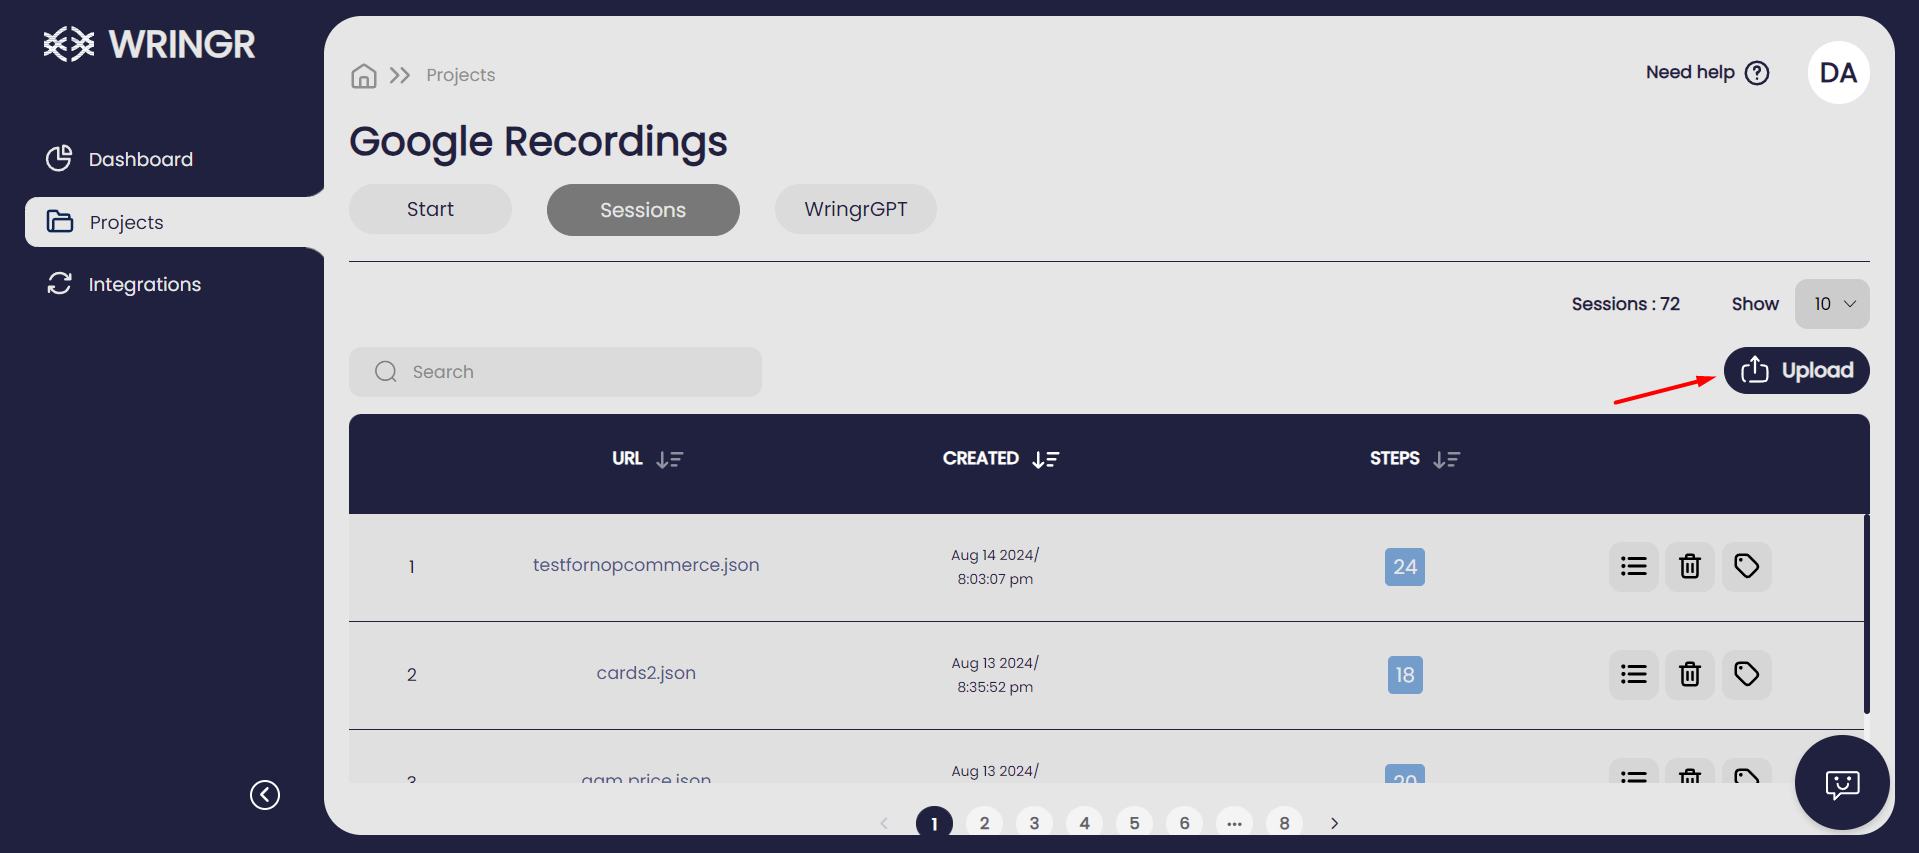
Go to the "Sessions" Tab:
- In your project’s interface, click on the "Sessions" tab. This section provides an overview of all recorded sessions associated with the project.
Upload the Recorded Session:
- Click on the "Upload" button located on the right side of the screen. A file dialog will appear, allowing you to select and upload your recorded session (typically in JSON format).
Review the Uploaded Sessions:
- After uploading, the session will appear in the list as shown in the screenshot. The list includes details such as the session name (e.g.,
fokoui nopcommerce.json), the creation date, and the number of steps involved in the session. - You can perform various actions on each session, such as running tests, editing session details, deleting sessions, or tagging them for easier categorization.
- After uploading, the session will appear in the list as shown in the screenshot. The list includes details such as the session name (e.g.,
This process allows you to integrate real user interactions into your Wringr project, enabling comprehensive analysis and automated testing based on actual user behavior.
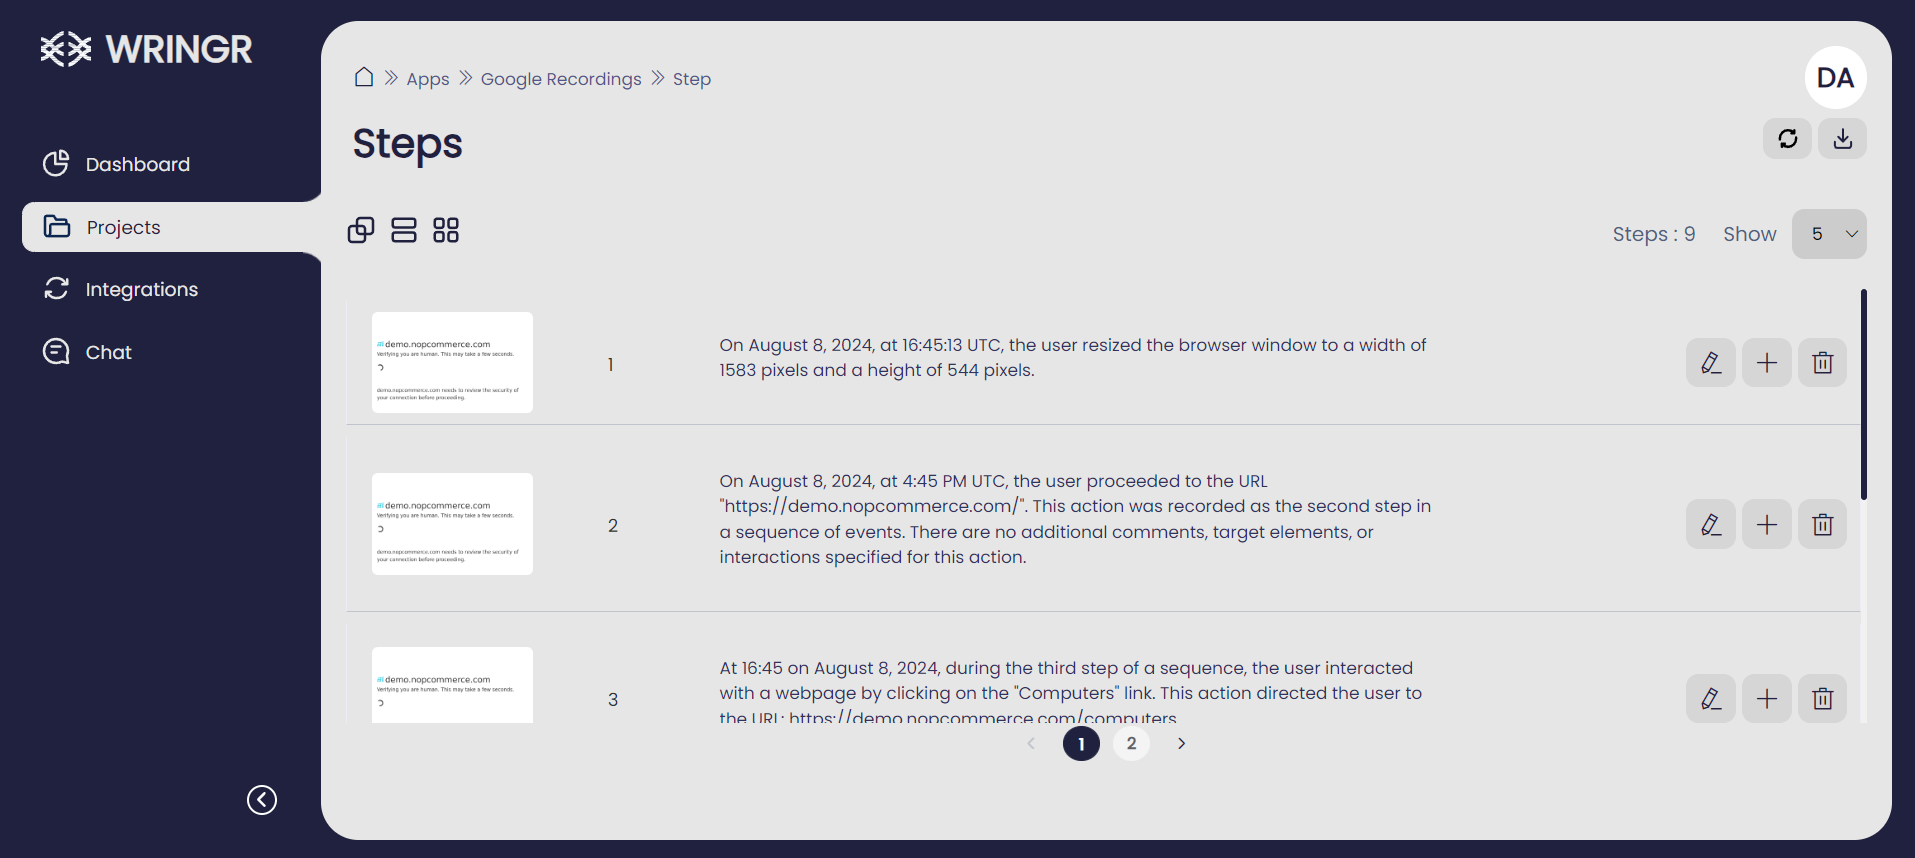
Now you can review the steps, descriptions, and screenshots, and even extract them for use in different integrations.
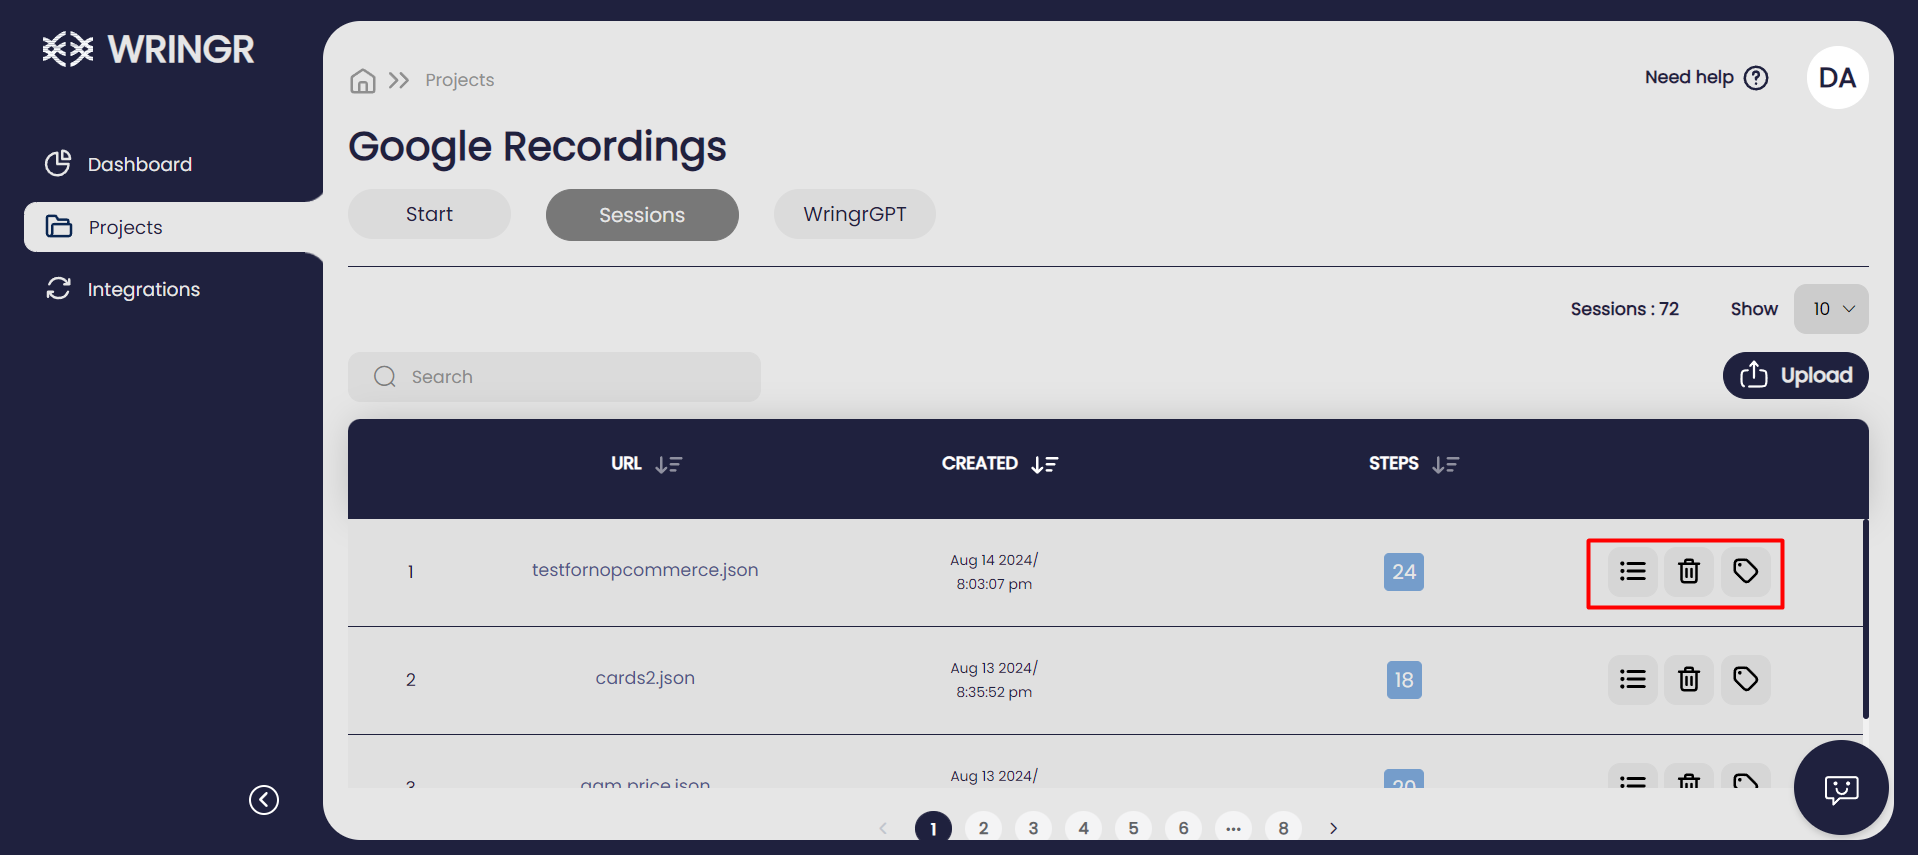
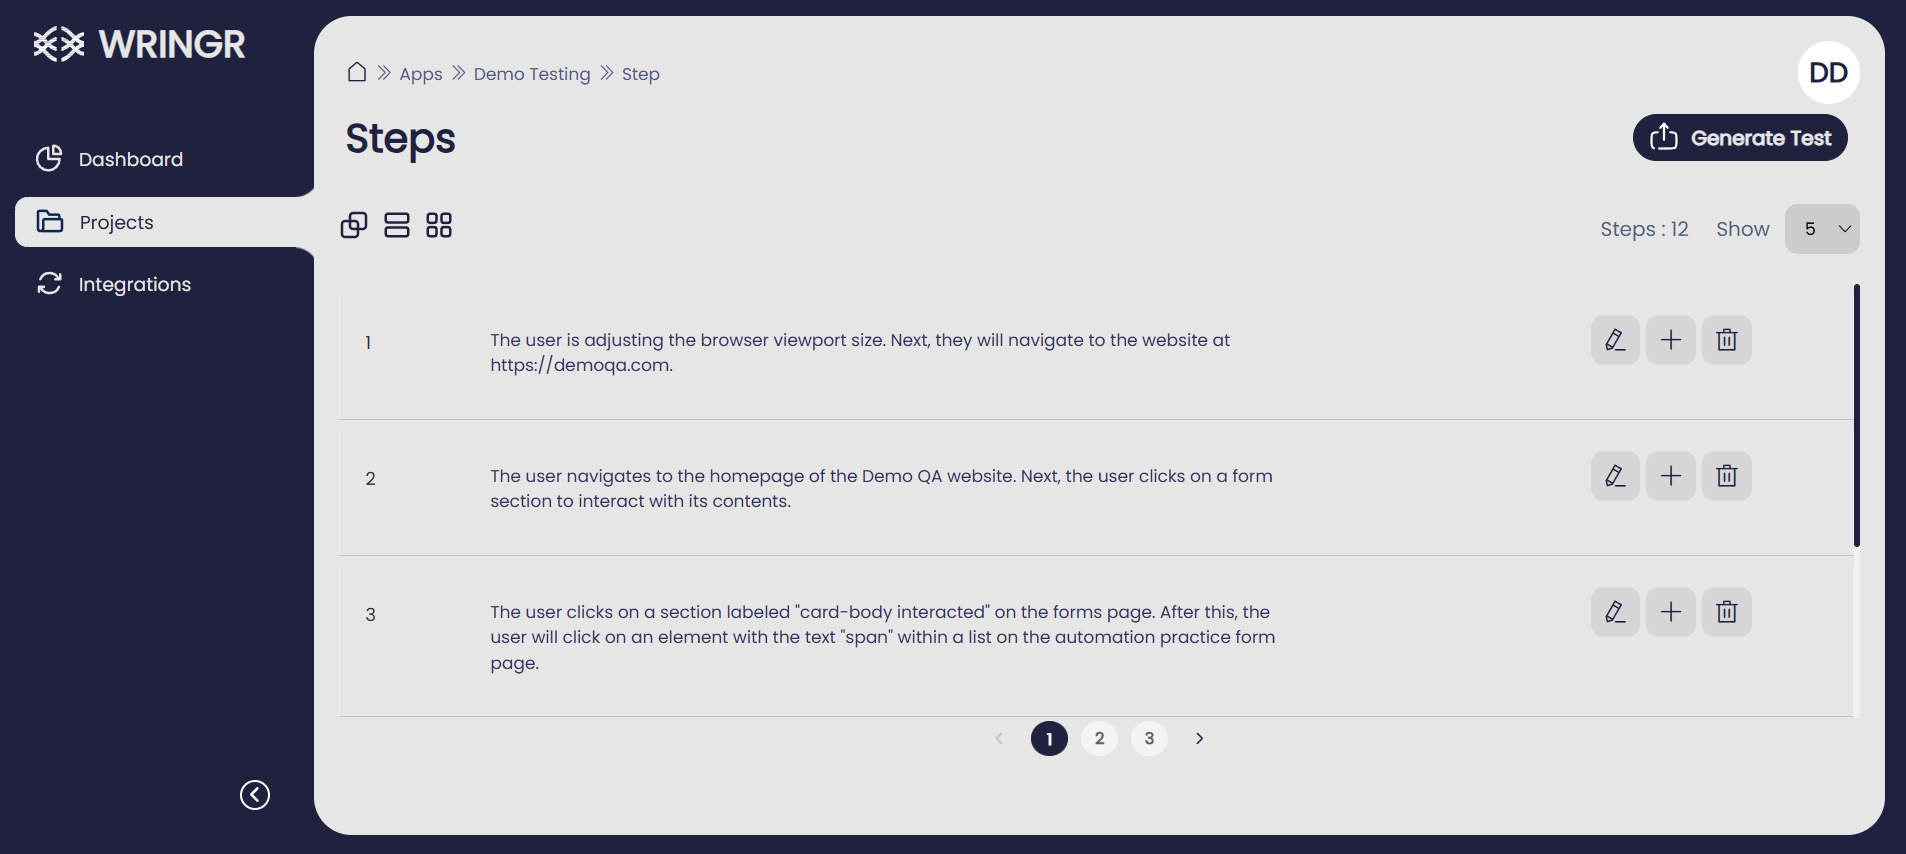
Steps
Wringr AI enables you to access and review the detailed sequence of actions captured during your test session. By navigating to this section, you can examine each recorded step, review the associated descriptions, and make any necessary adjustments to refine and ensure the accuracy of your test cases.
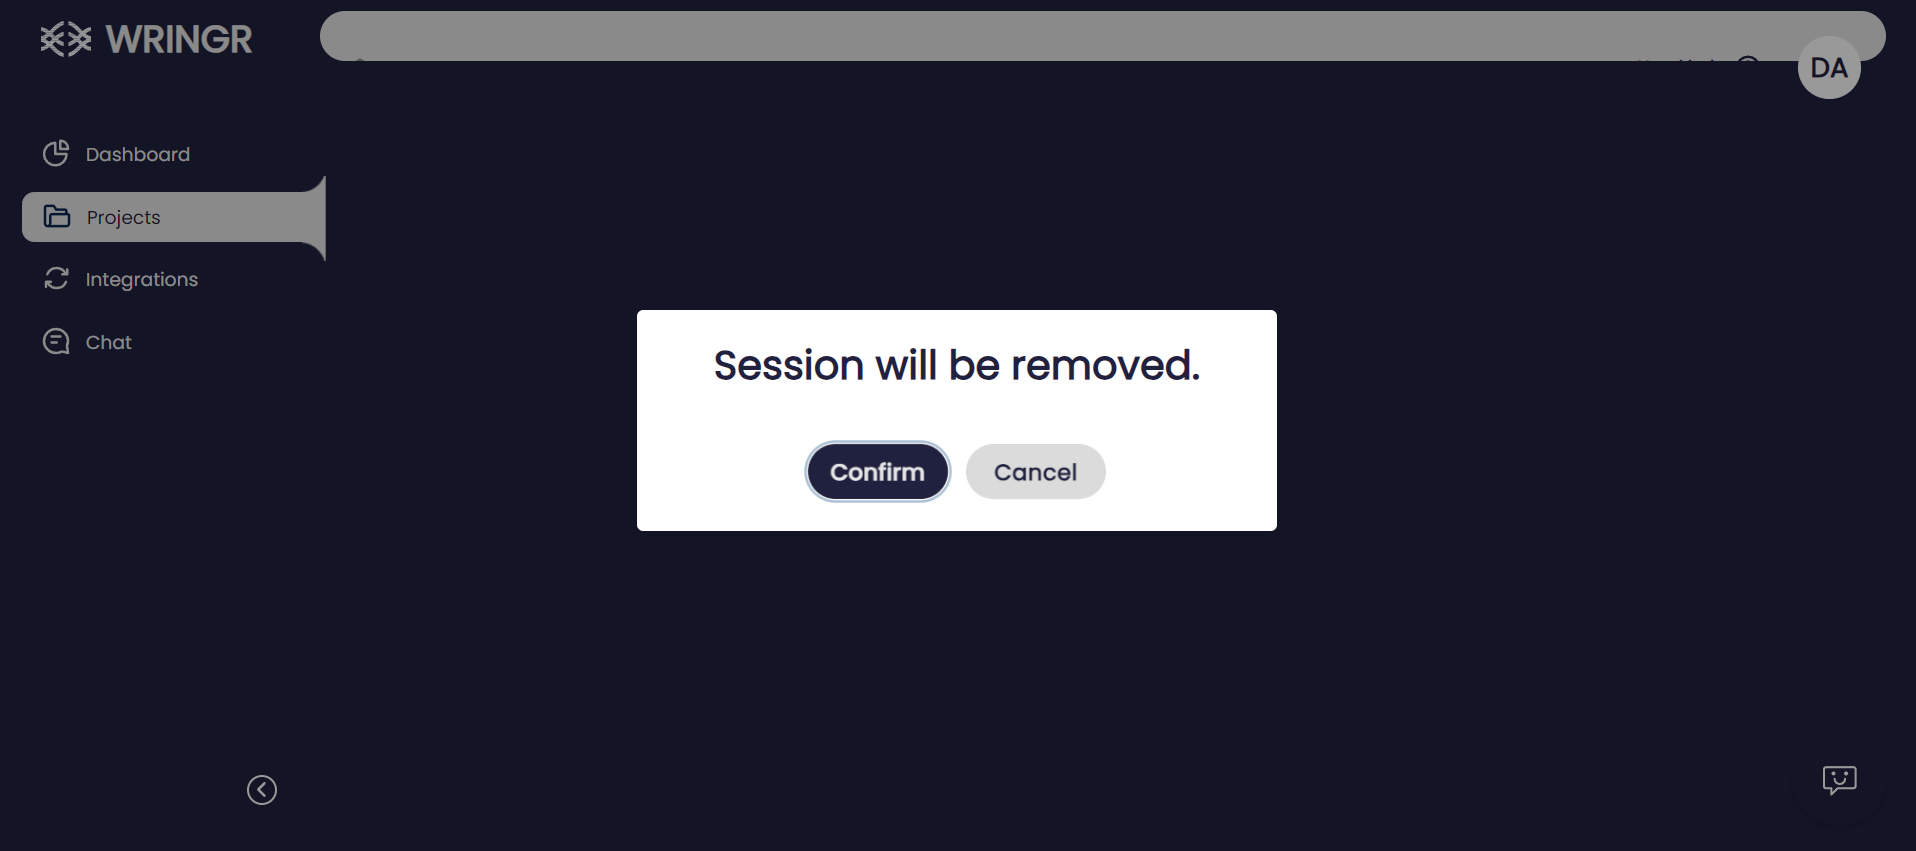
Delete Session
The "Delete Session" feature in Wringr AI empowers you to permanently remove an entire test session from the platform. By using this option, all associated data—including recorded steps, screenshots, and test results—will be permanently deleted. Please proceed with caution, as this action is irreversible and cannot be undone.
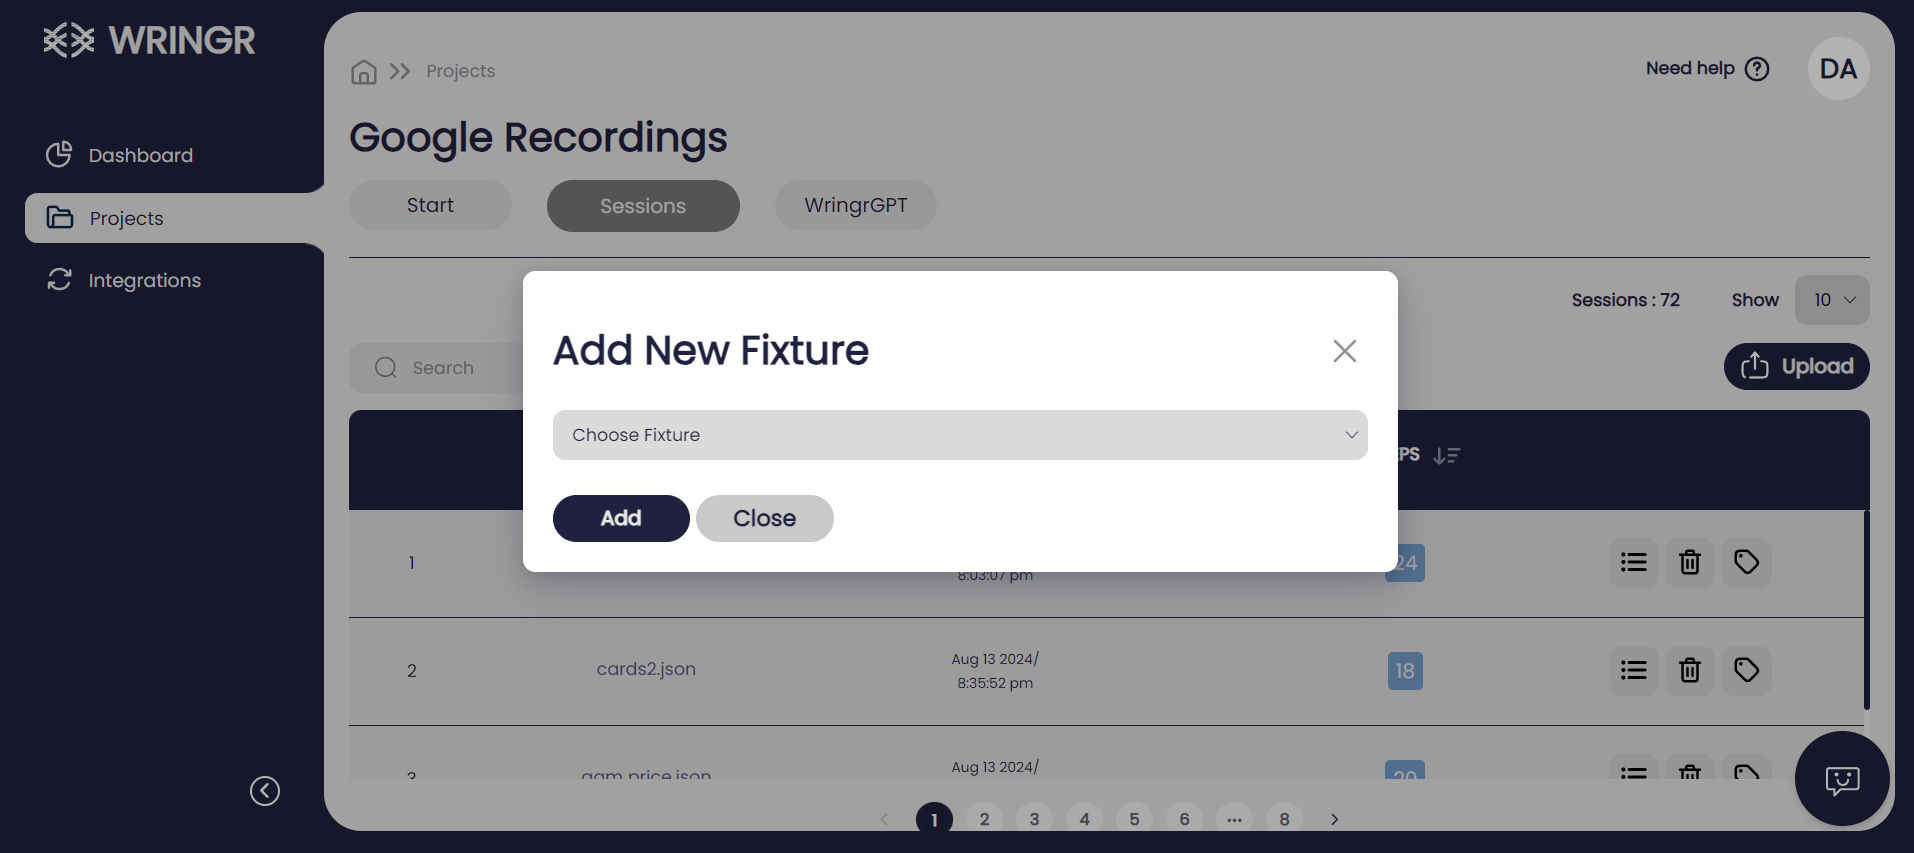
Add Fixture
Wringr AI enables you to insert predefined data or setups into your test session. Fixtures are valuable for establishing consistent test environments, ensuring that your tests run under the same conditions each time. By leveraging this feature, you can streamline test preparation and enhance the reliability of your results.
In the Steps section, you will find detailed information about each recorded step in your test session. In the top right corner, you will see a button:
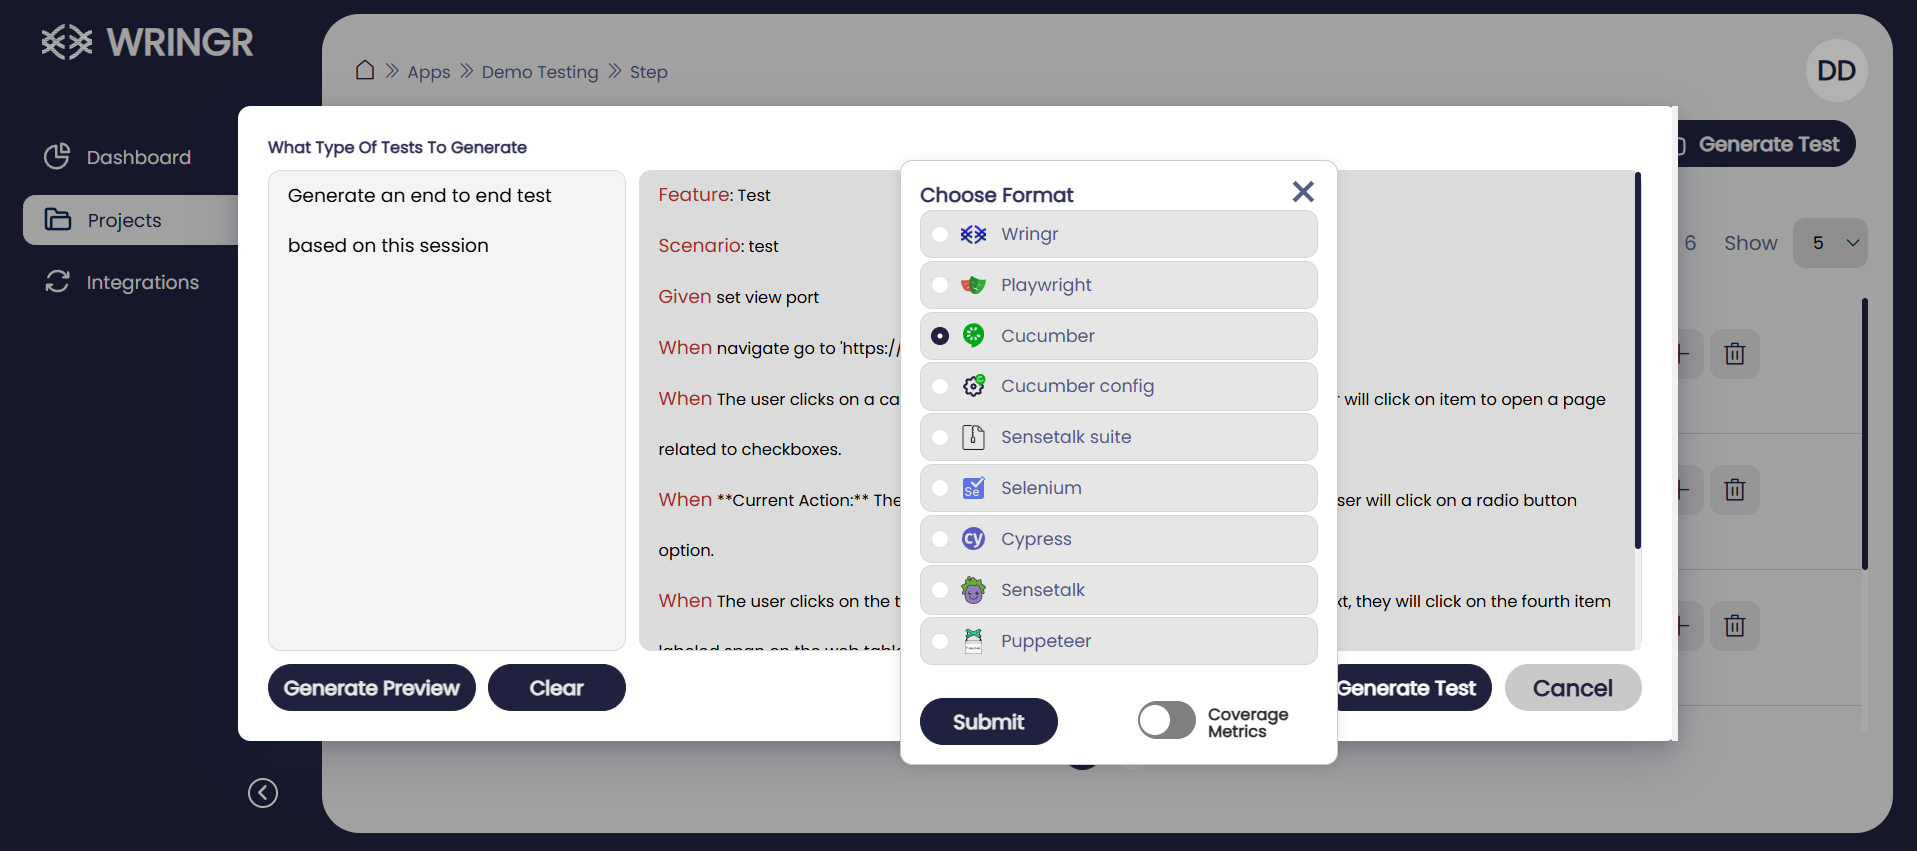
The "Generate Test" button initiates the process of creating a test based on the current session or settings, allowing you to define or refine parameters for the test.
- Prompt Section (Left Pane):
The left panel is where you "Write a prompt." This is likely where you input text or a query to define what kind of test you'd like to generate.
- Preview or Output Section (Right Pane):
The blank area on the right might display the generated test or preview based on the input provided in the left section.
- Options Below the Prompt:
There are three options:
Generate an end-to-end test based on this session: This seems to create a complete test that covers all steps in the session.
Generate a few tests based on this session: This option might create multiple smaller or segmented tests.
Generate different data combinations based on this session: Likely generates test cases with varied input data combinations.
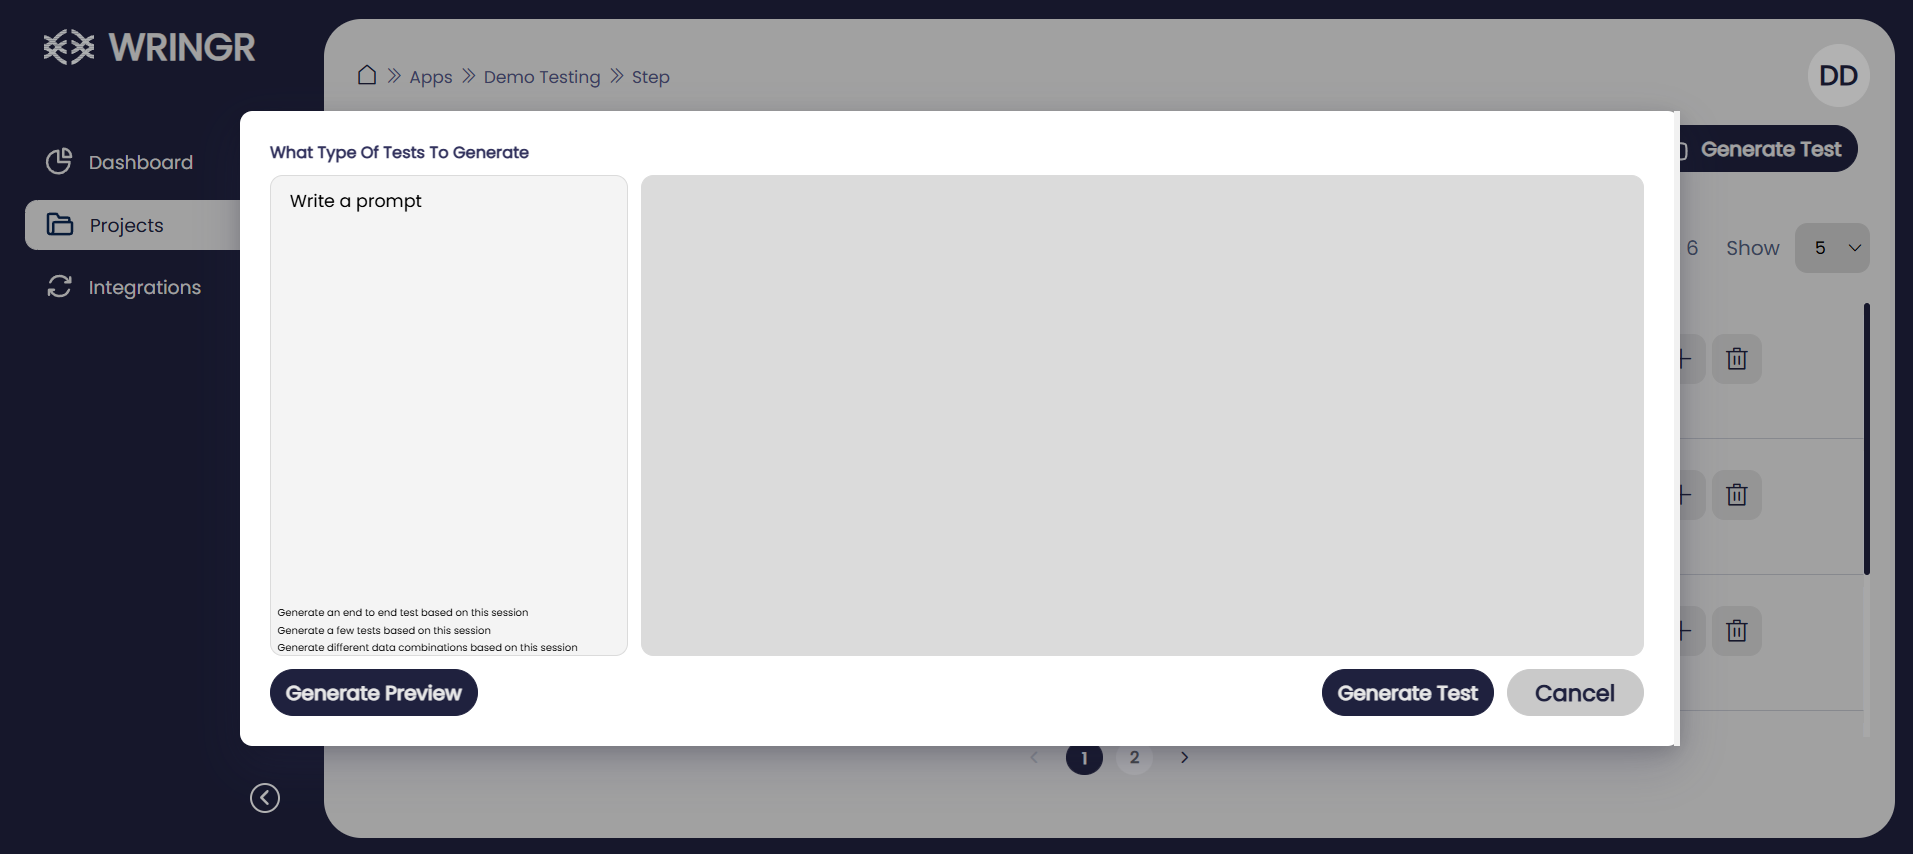
- Buttons at the Bottom:
- Generate Test: This button triggers a preview of the test based on the prompt and options selected.
- Cancel: Allows you to exit this interface without saving changes
Additionally, you can:
- Edit Steps: Modify existing steps to adjust descriptions or actions.
- Add Steps: Insert new steps into the test session to enhance coverage.
- Delete Steps: Remove unnecessary or incorrect steps to streamline your test case.