Wringr AI and API
Wringr AI allows you to create a new test specifically designed for REST API endpoints. It enables you to define the API's request details and validate its responses.
Uploading an Existing API Test
Navigate to the Sessions Page:
Go to the Sessions page where all API testing sessions are managed.
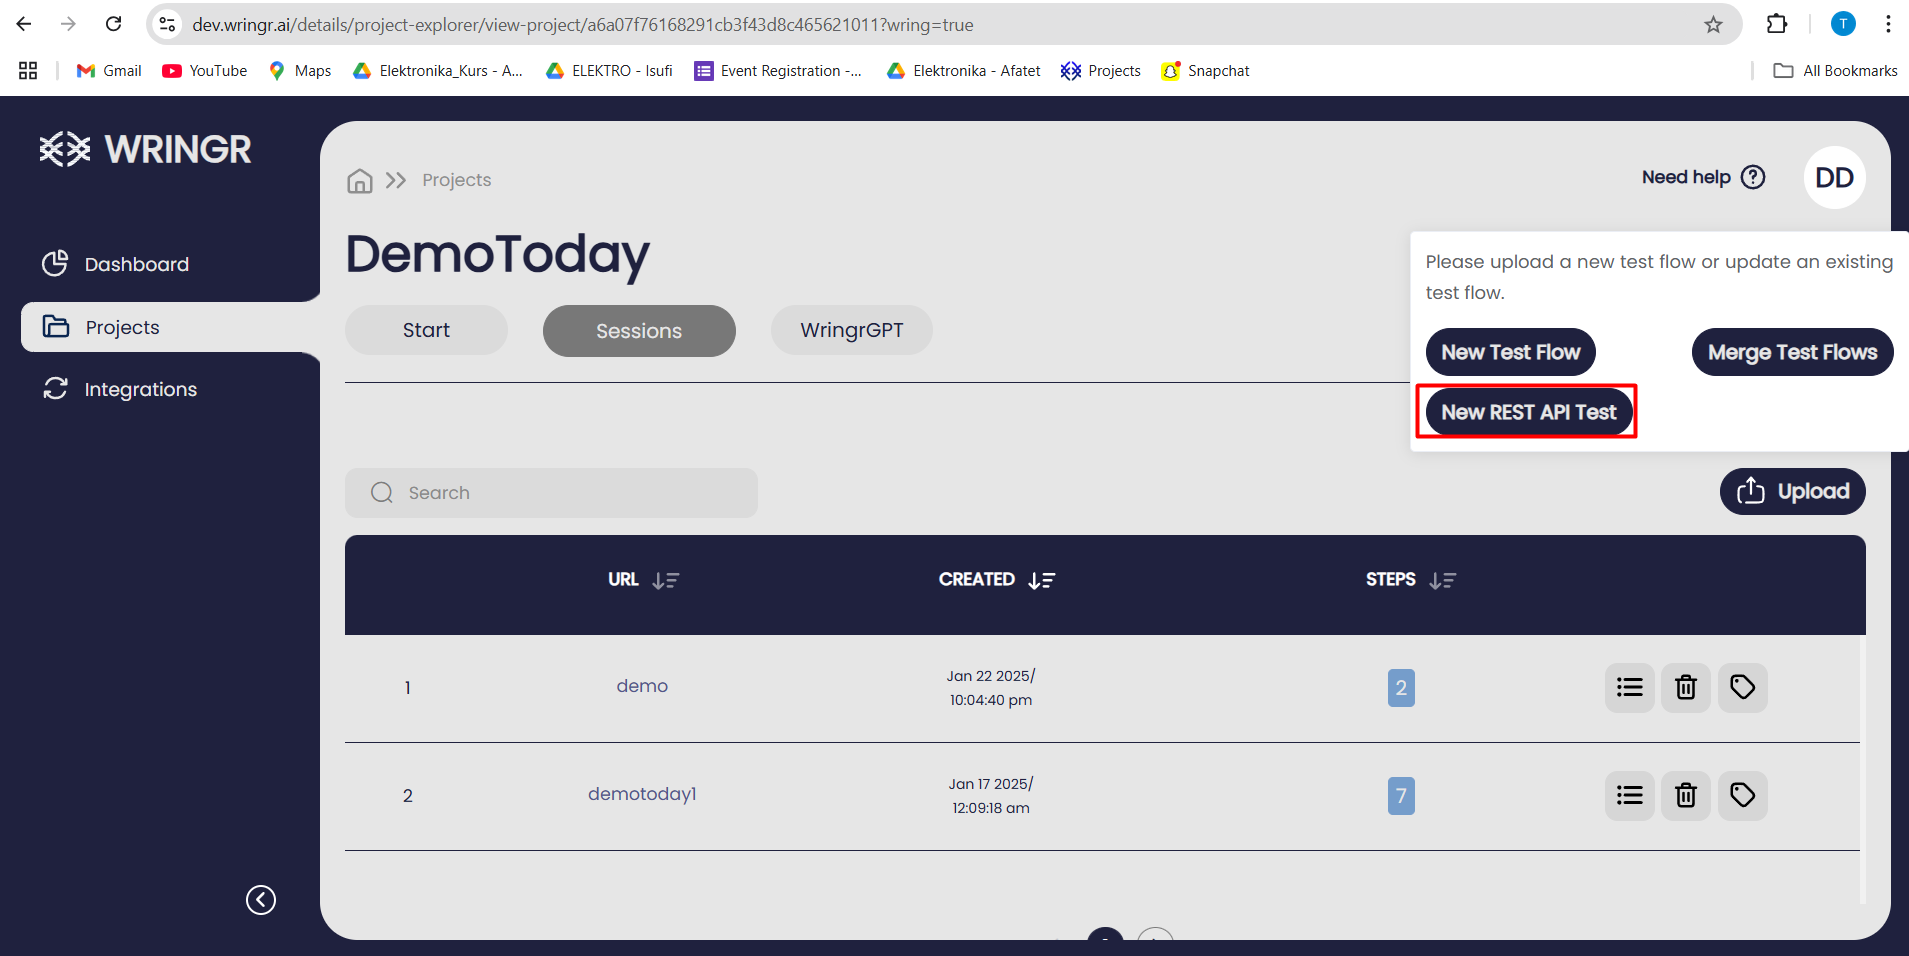
Click the Upload Button:
Look for the Upload button on the page and click it to reveal the available upload options.
Click the New REST API Test:
Allows you to set up a new test specifically for REST API endpoints. You can upload an API description file (e.g., JSON), define requests, validate responses, and simulate various scenarios for API testing.
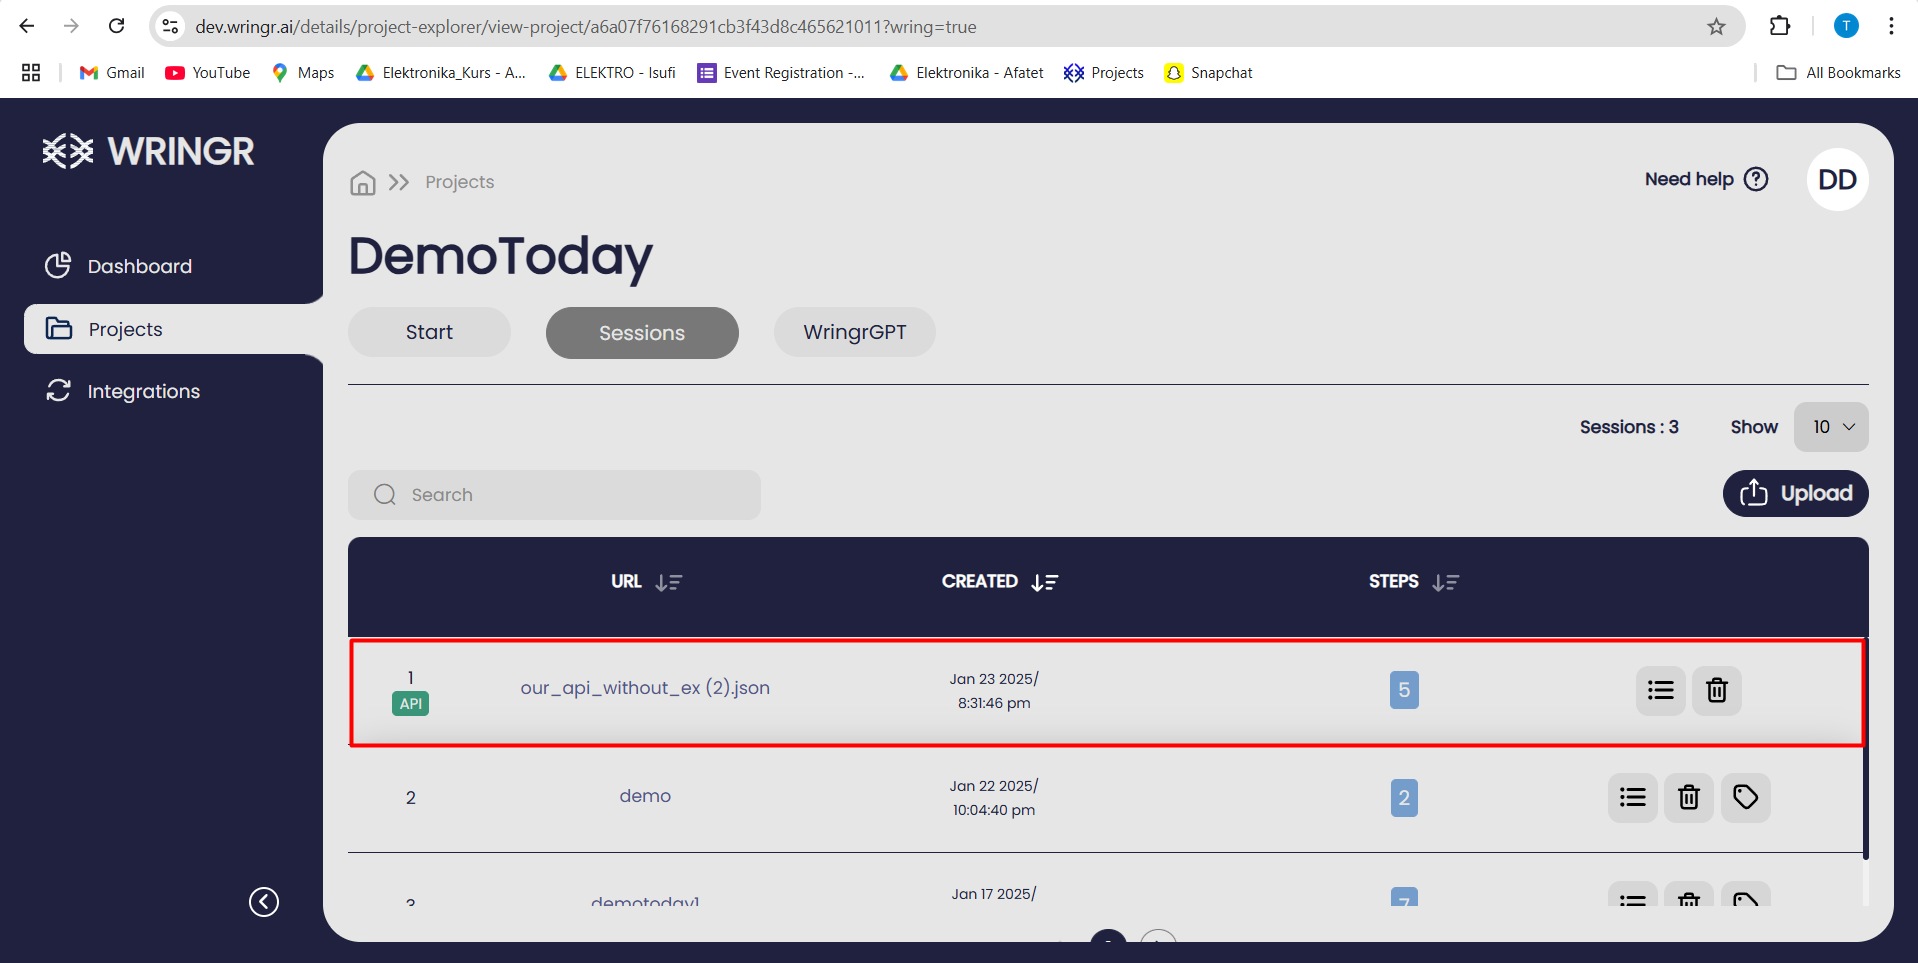
Uploaded test
Once you upload the test flow or API, it will appear as a new session or test case in the interface. This allows you to review the details, modify the test configurations, and run parameters as needed
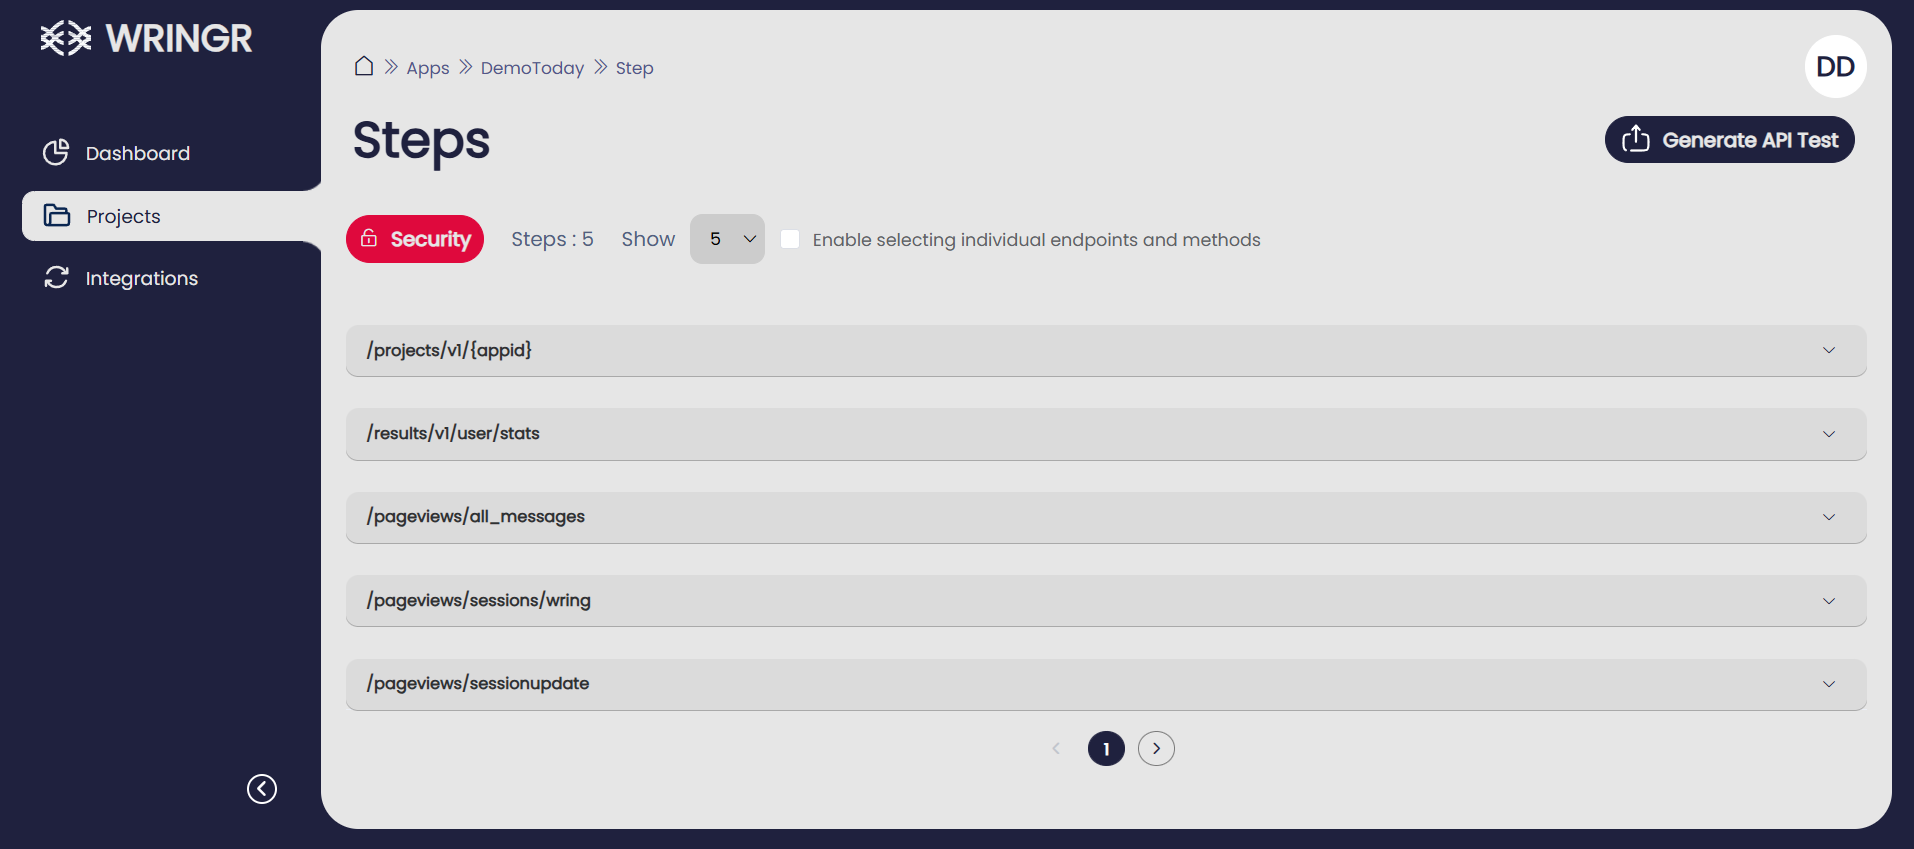
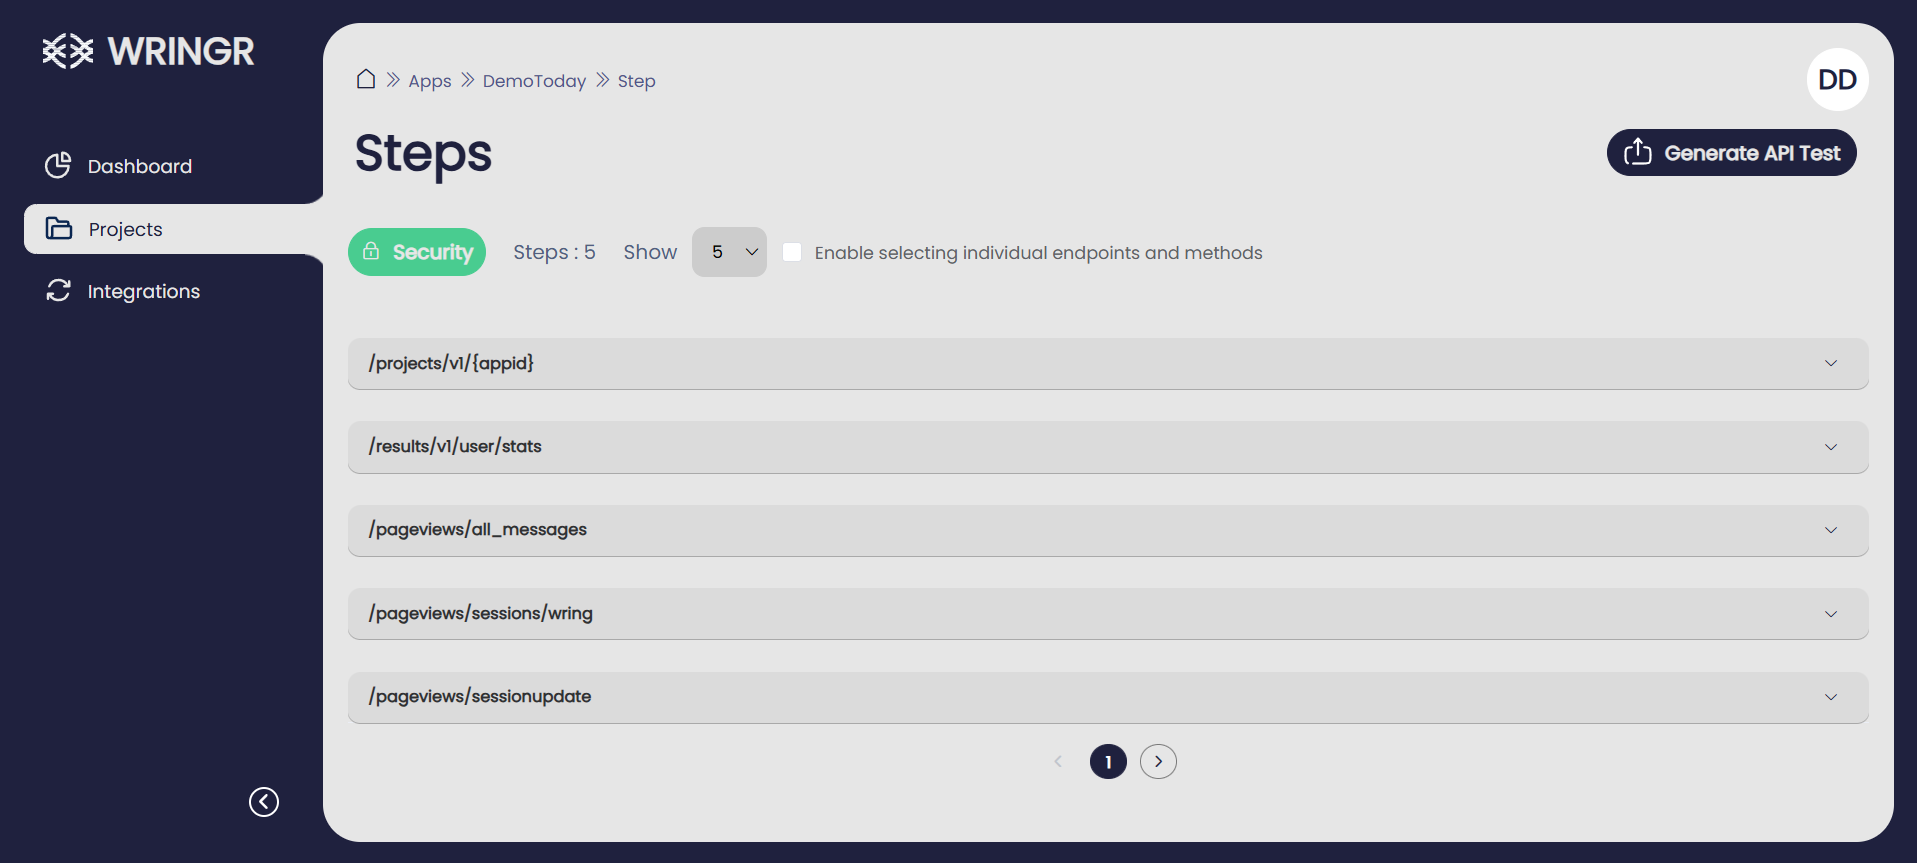
Exploring the API Endpoints
- Navigate to the API Description Page:
Go to the API Description page, which provides a comprehensive list of all available endpoints in the uploaded API.
- Expand Each Endpoint:
Click on each endpoint to view its HTTP method (e.g., GET, POST, PUT, DELETE) and a brief description of its functionality. This will help you understand what the endpoint does and how it can be used.
- Explore Method Details:
Within each endpoint, expand further to access:
- Detailed Documentation: Includes specifics about what the endpoint does, its expected behavior, and any notes for developers or testers.
- Parameters: View and modify input parameters such as query strings, path variables, headers, or body content. You can customize these to simulate different scenarios and test cases.
- Responses: Inspect the expected output, including status codes, headers, and body structure (e.g., JSON schema).
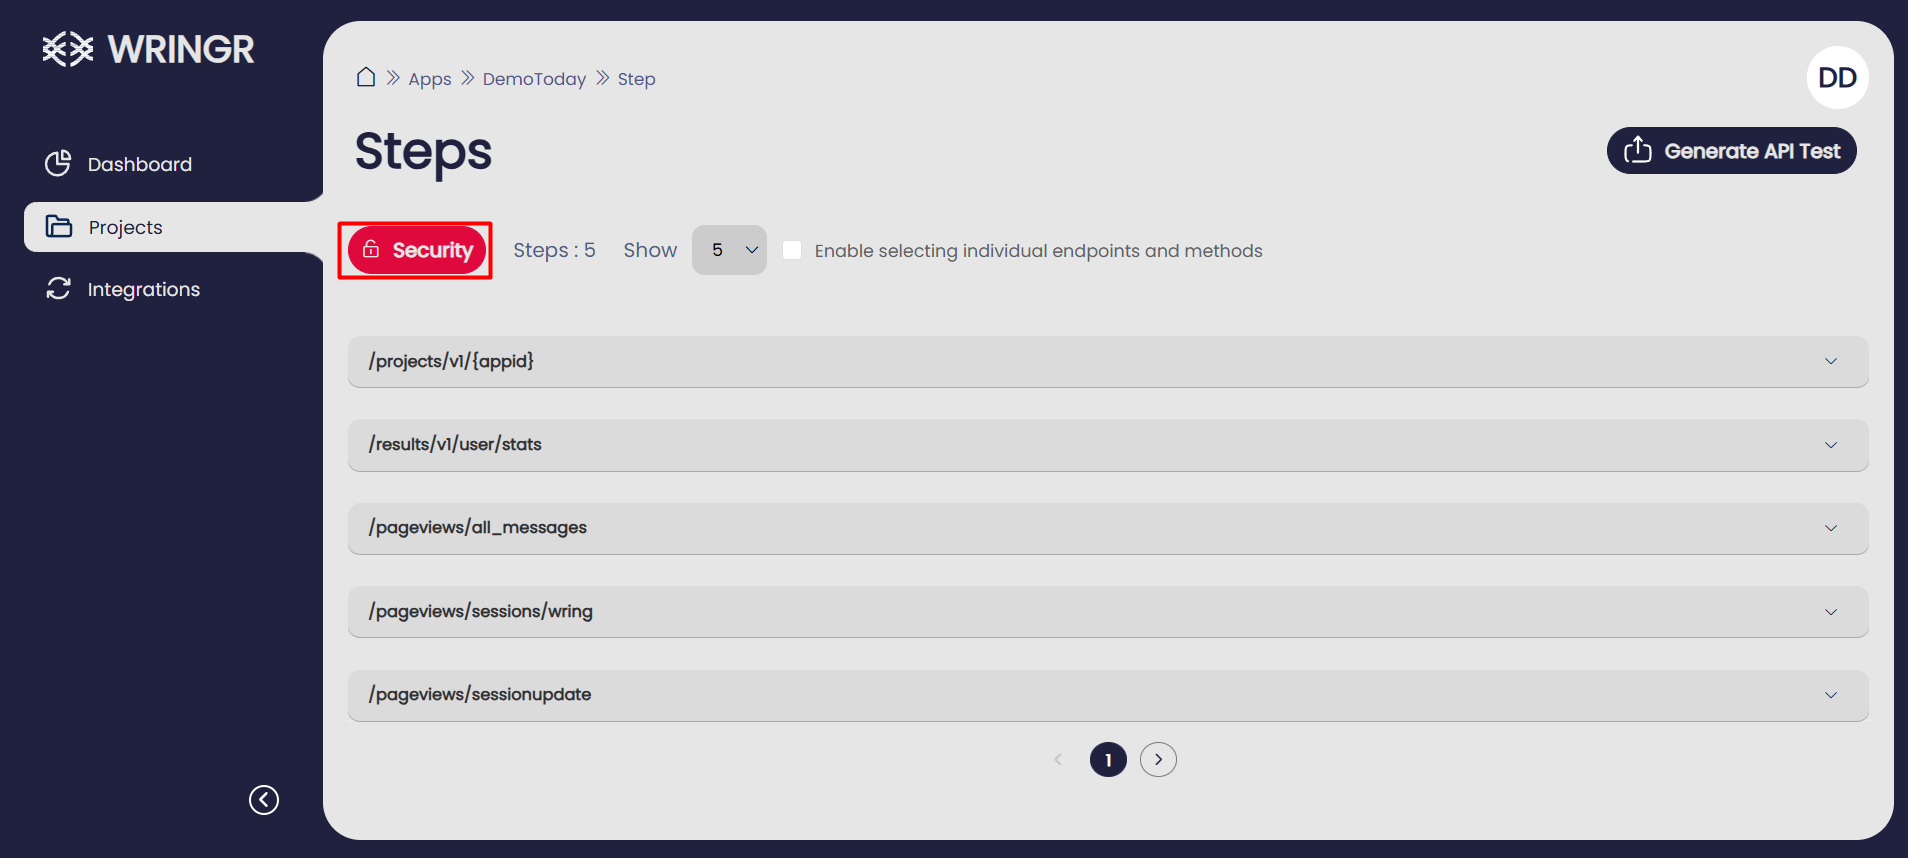
Adding Security (Headers and Auth Token)
- Access the Security Settings:
In the top-right corner of the interface, click on the Security button to configure security settings for your API tests.
- Add Authorization and Headers:
Auth Token: Add an authentication token using the format:
Authorization: Bearer <your-token>
This ensures secure access to the API, especially for endpoints requiring authentication.
Headers: Define any additional headers that should be included with every request to the API. Examples include Content-Type, Accept, or custom headers required for your application.
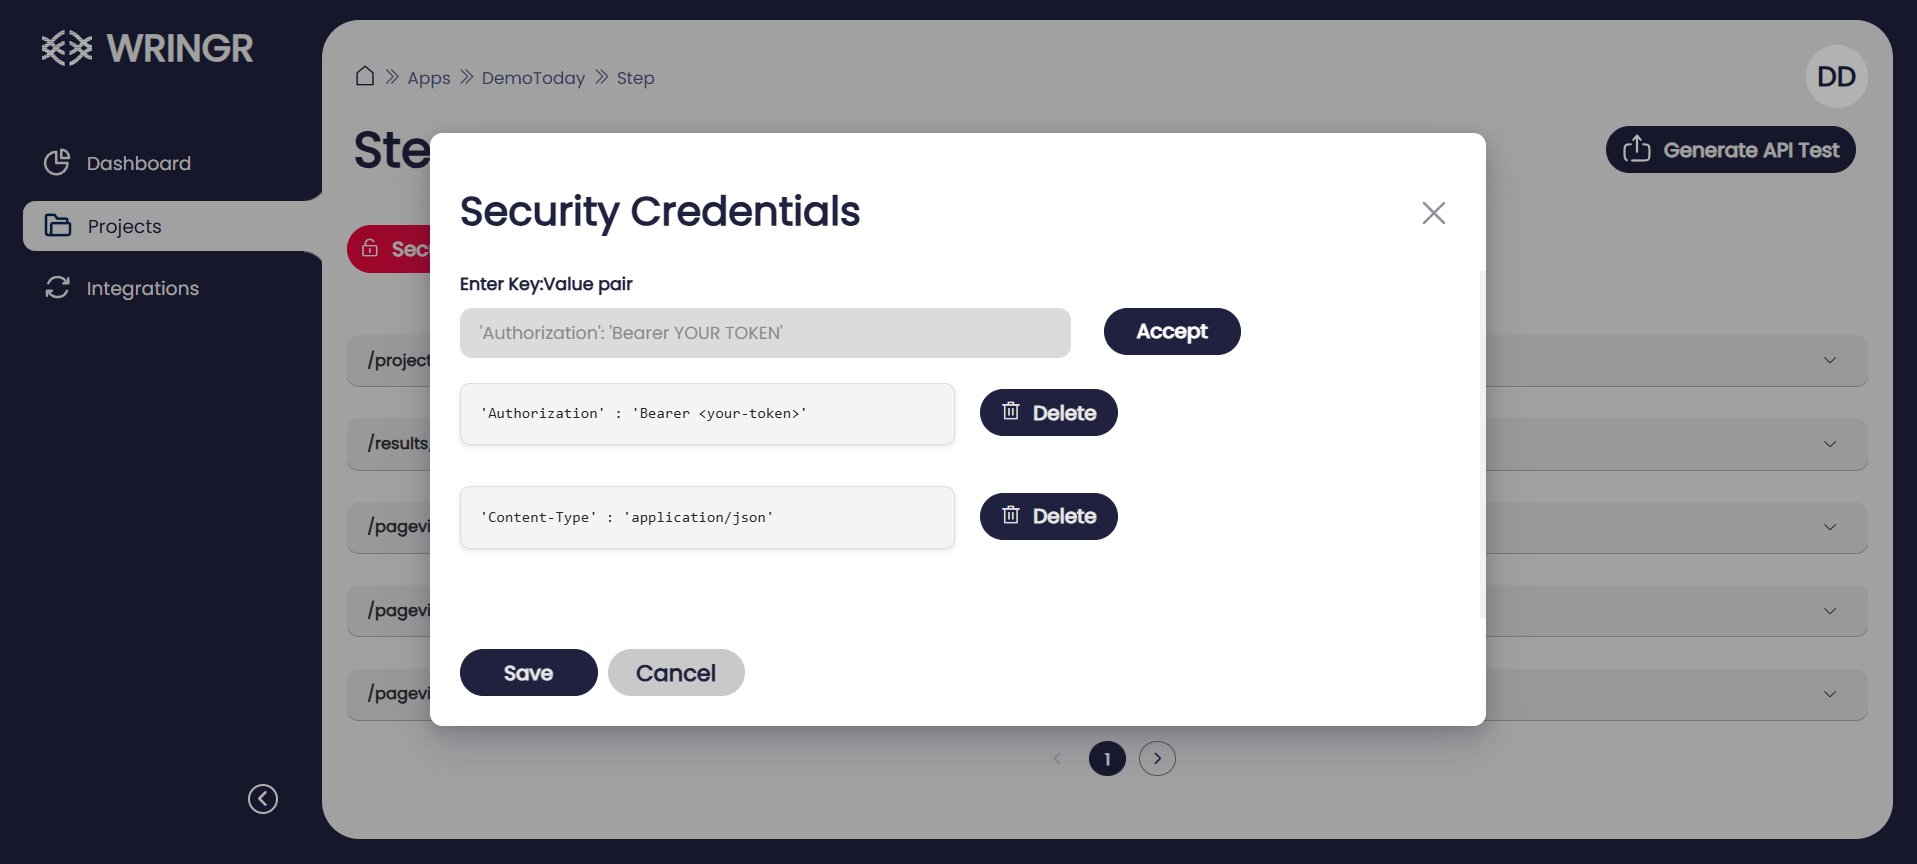
Important Notes:
- Content-Type: Ensure this header is set to
application/jsonto handle JSON data properly in your requests and responses. - Authorization Header: Pay close attention to the format and case sensitivity (e.g., "Authorization" with a capital "A"). Mistakes in casing or formatting could result in failed authentication.
- Save Your Settings:
Once you’ve configured the headers and auth token, save the changes to apply them to all subsequent requests within the session.
Adding Parameters to Endpoints
- Select an Endpoint:
Navigate to the desired endpoint from the list and click on the Add Parameter option.
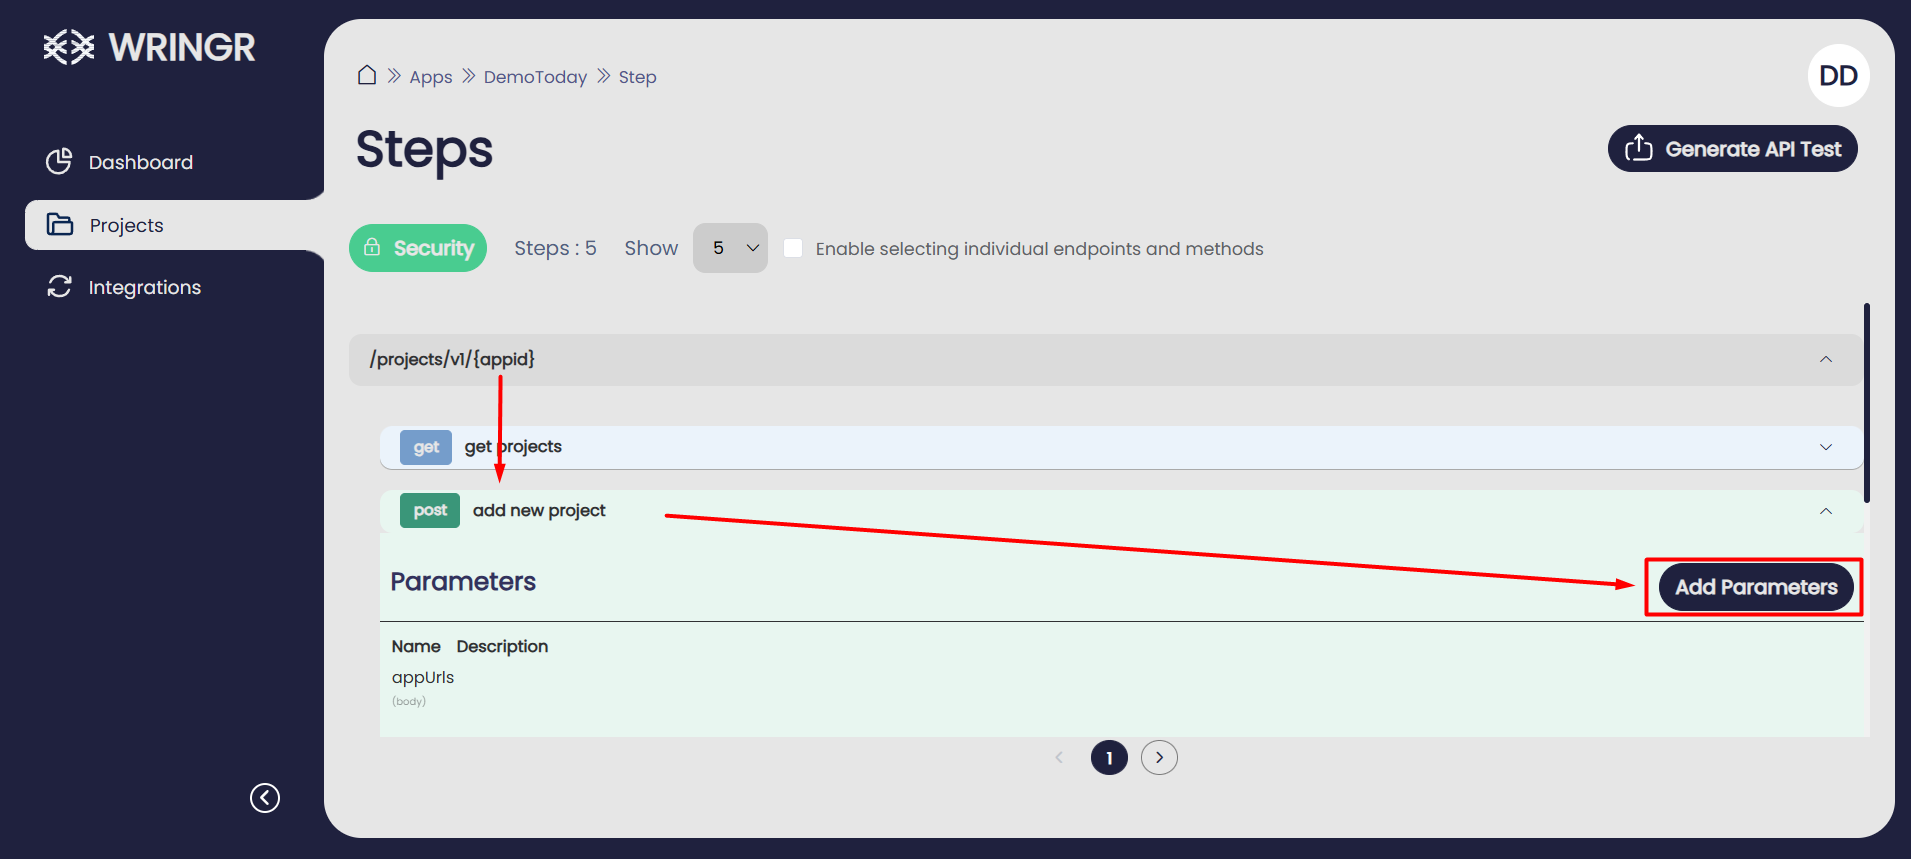
- Use the Parameter Modal:
A modal window will open, allowing you to configure parameters for the selected endpoint. You have two options:
- Manual Entry: Add parameters one by one by entering the key (parameter name) and value (data or value to be sent). This method is useful for quick edits or specific configurations.
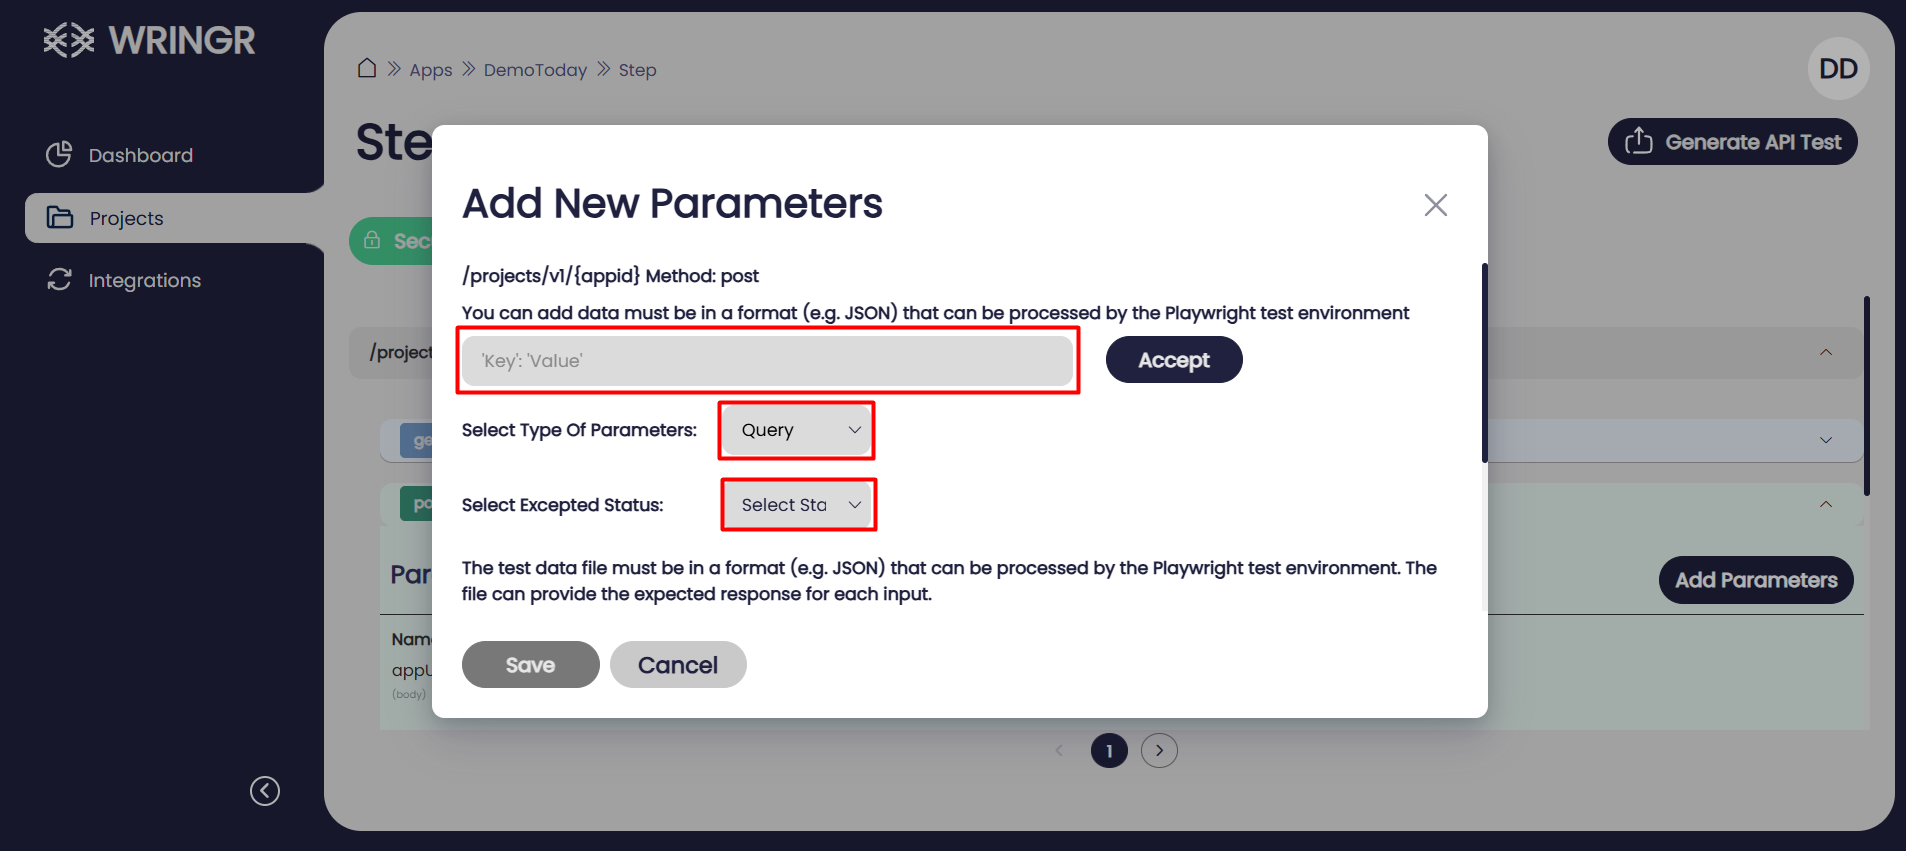
- Upload a JSON File: Upload a pre-prepared JSON file that contains multiple parameter values. This approach is ideal for batch uploads or reusing parameter sets across different endpoints.

- Save and Apply Parameters: After adding or uploading parameters, save your changes to ensure they are applied to the selected endpoint. You can now proceed to test the endpoint with the specified parameters.
Expected Response Status
- For each parameter input, you can define the expected status code for the corresponding endpoint.
- This is particularly useful when specific parameters are required. If a parameter is missing or invalid, you can configure the expected status code to match the behavior outlined in the API method’s documentation.
Parameter Types
- The default parameter type is
Query. - Other supported types are
Path,Headers, andBody. - You can specify the parameter type in the JSON structure, such as
"in": "query", to indicate where the parameter should be included in the request.
Once you’ve completed all these steps, you can select the desired endpoint and start executing the tests.