Running API with Wringr AI
JSON File Format Examples
Below are two examples of the JSON file structure you can upload as parameters.
1. Simple JSON Structure
{
  "appUrls": ["url"],
  "customjson": ["{json}"],
  "name": "Test Parameters"
}
- The default status code is set to 200.
- Parameters are, by default, treated as query parameters.
2. JSON Structure with Expected Status and Multiple Parameters
{
  "expect_status": 400,
  "user_id": {
    "value": "22c286cf-d146-4573-980e-e83372715293",
    "in": "query"
  },
  "page": {
    "value": "1",
    "in": "query"
  }
}
- In this case,
expect_statusis set to 400, representing the anticipated status code when a required parameter is missing or invalid. - Each parameter is defined by a key (e.g.,
user_id) corresponding to the endpoint's parameter name. - The value field specifies the actual value of the parameter.
- The in field denotes the parameter type (e.g.,
query). If not specified, it defaults toquery.
Here’s an example of how to execute an API with parameters on the Wringr AI platform.
- Navigate to the Sessions Page
- Click on Upload button
- Click the New REST API Test
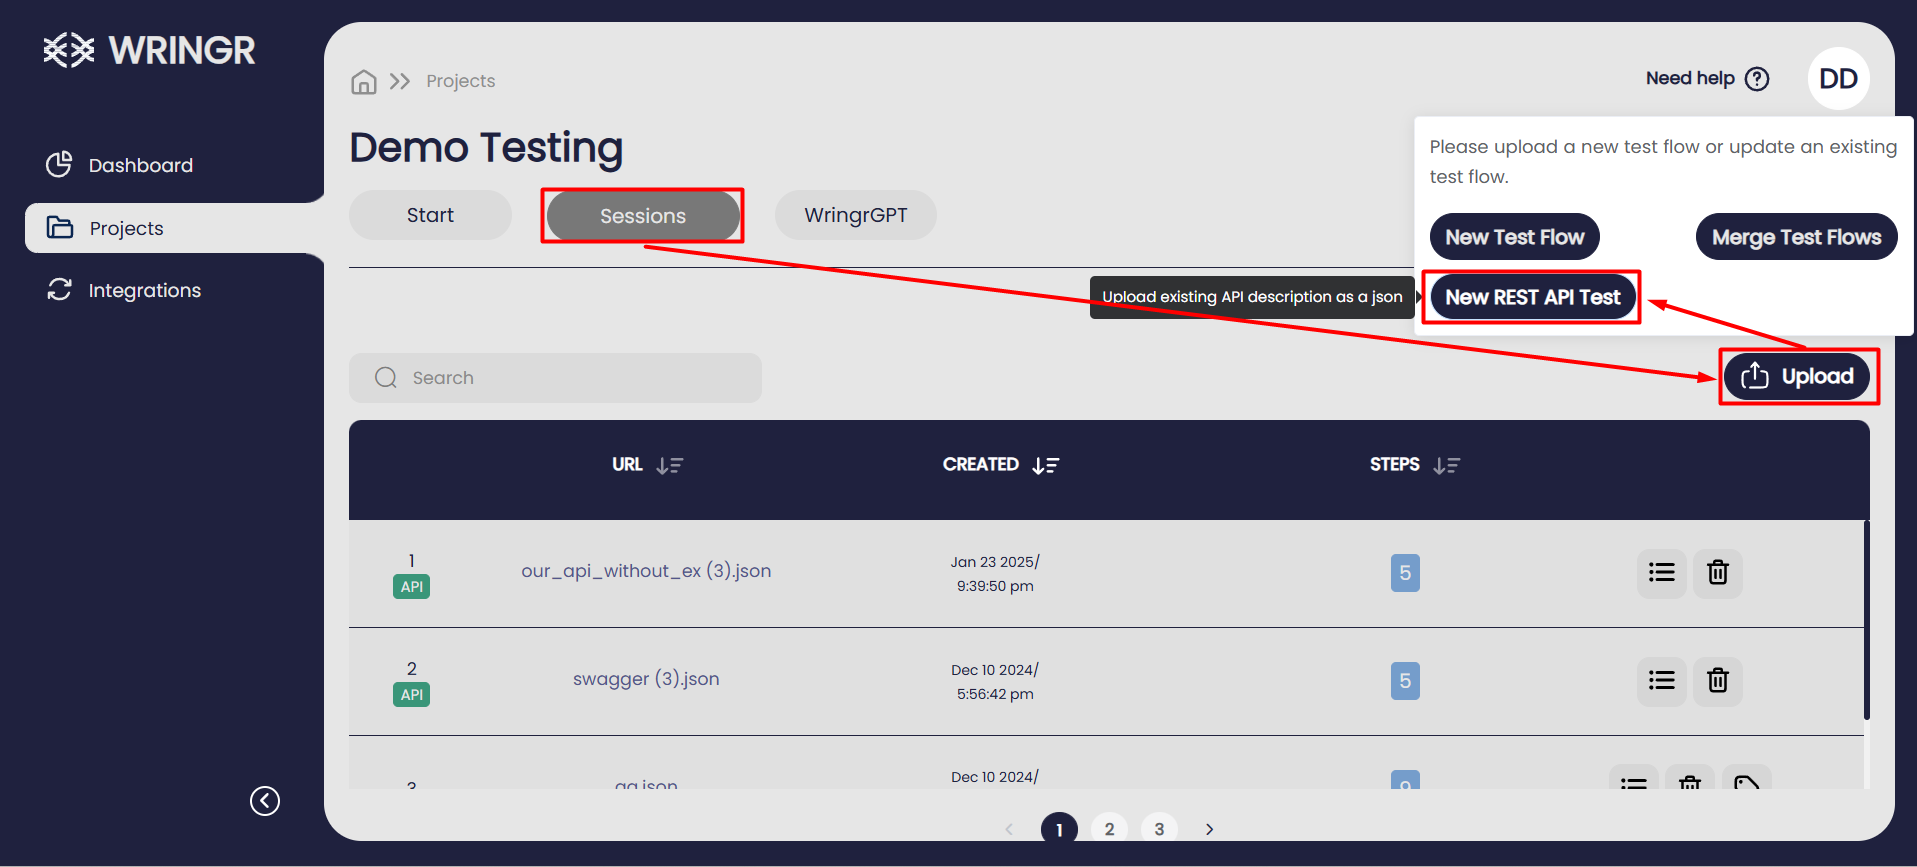
- The json is uploaded

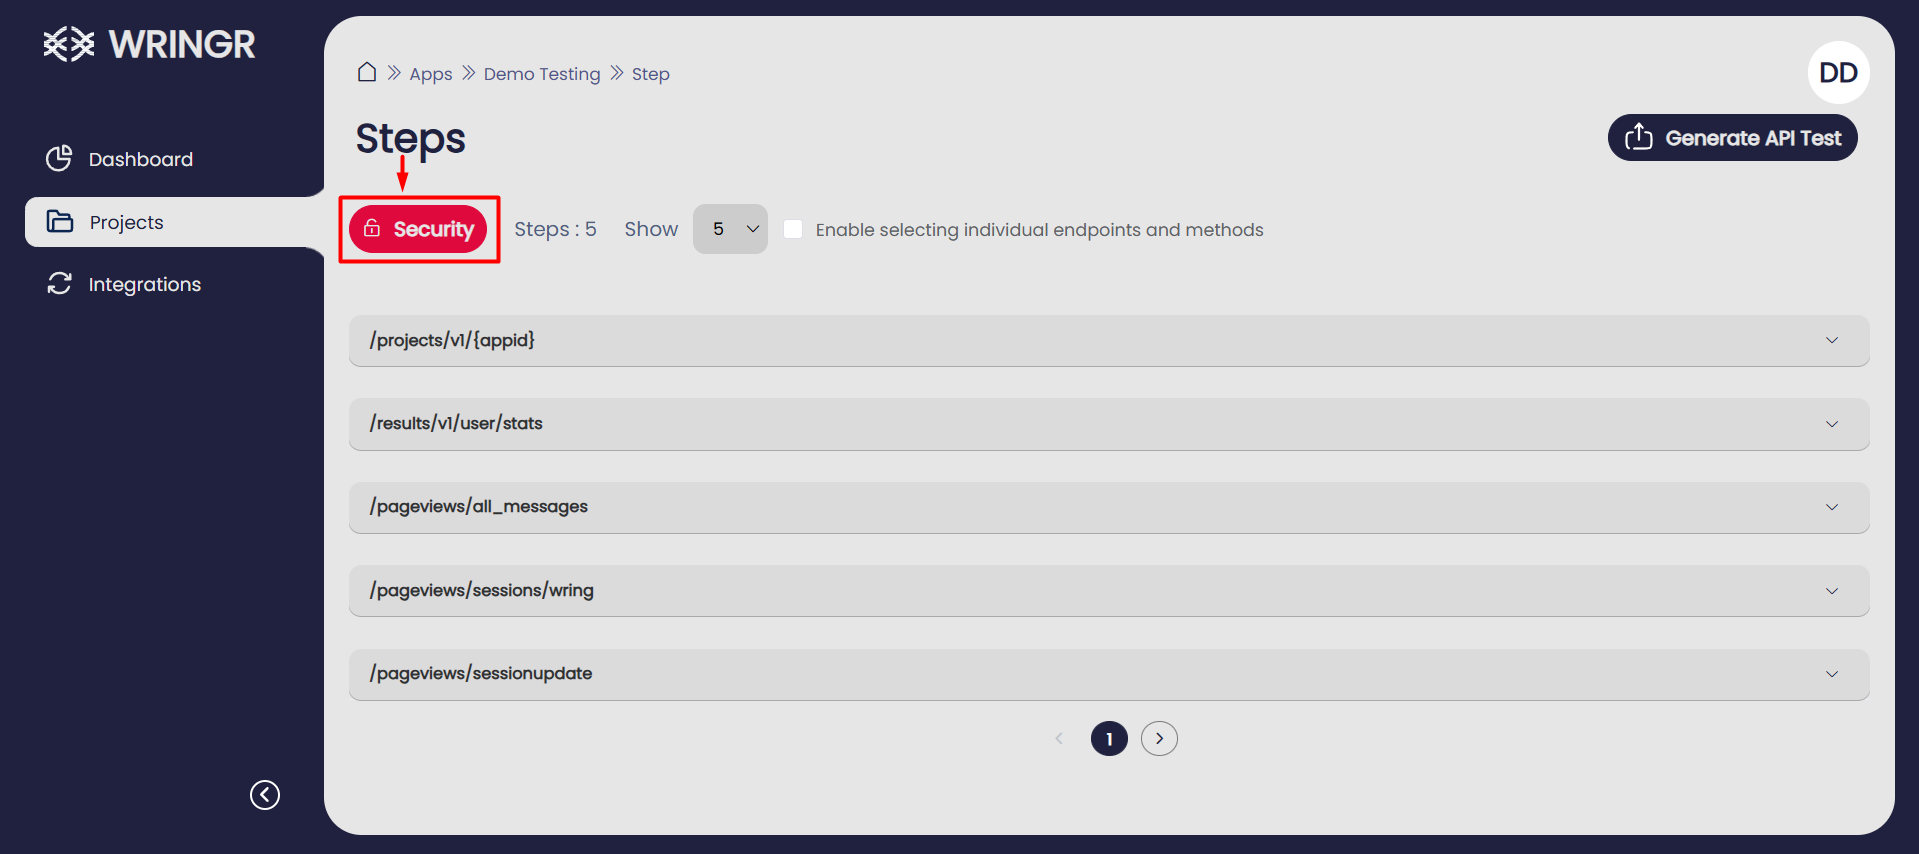
- Navigate to the "Steps" section.
- Click on "Security" to configure the security settings.
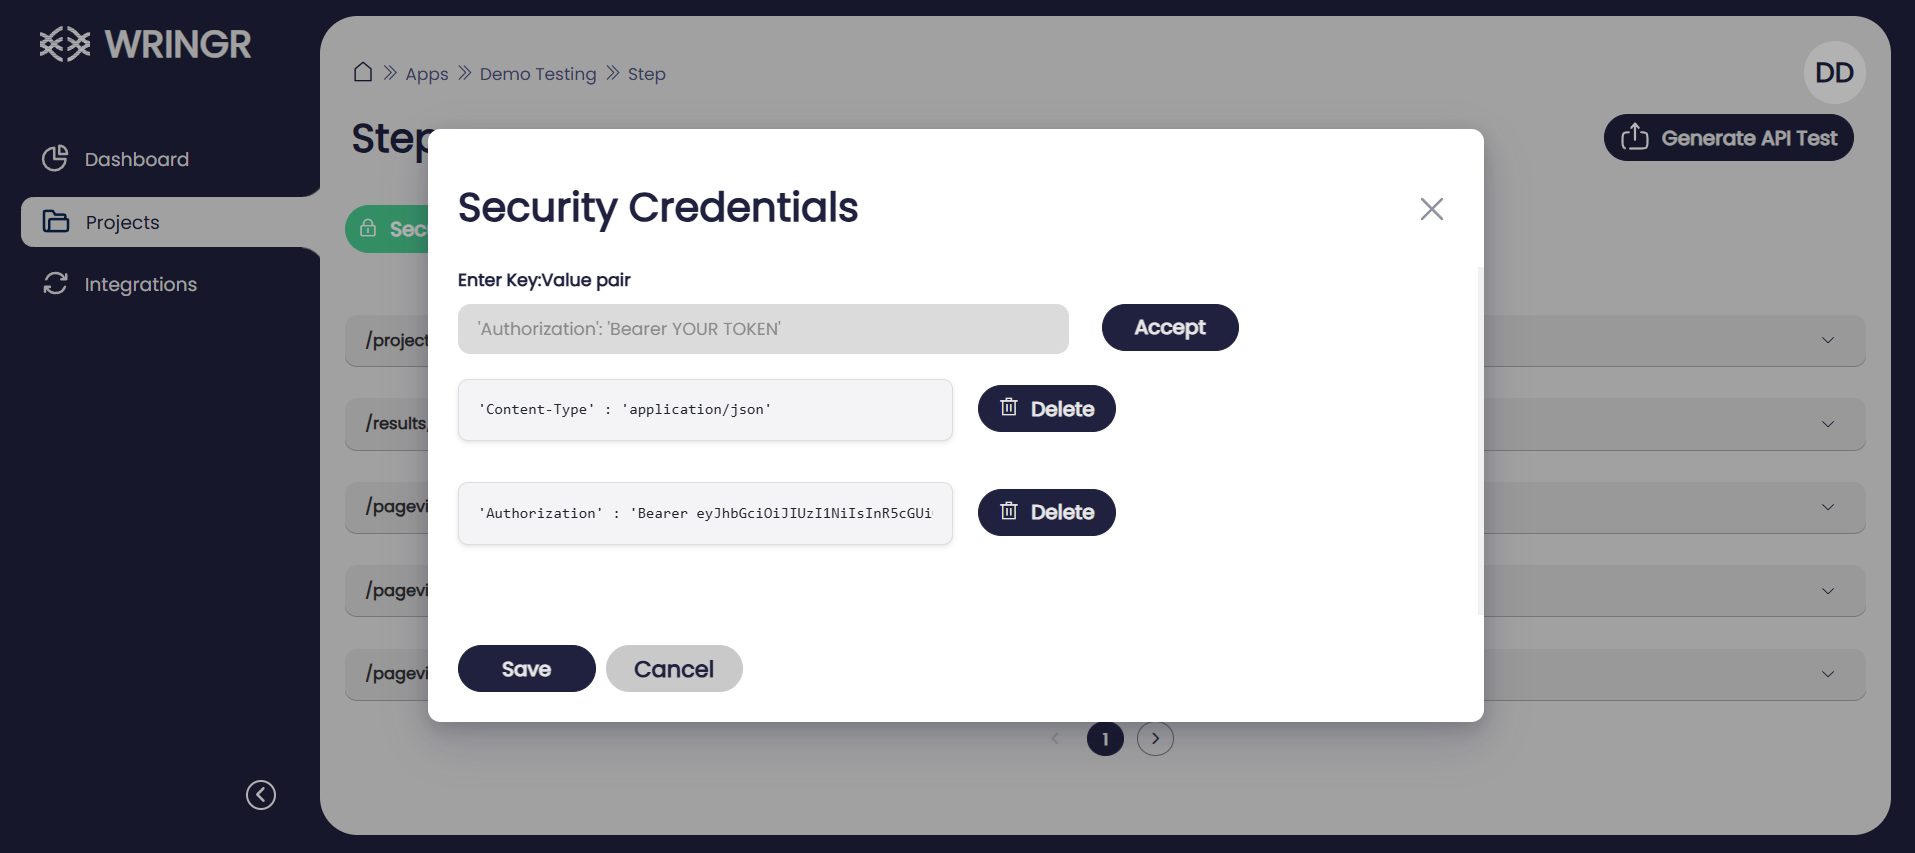
- Add Security Credentials
Content-Type : application/json
Authorization : Bearer <token>
- Expand the
/projects/v1/{appid}endpoint, or choose any other relevant endpoint from the list to configure or test its parameters
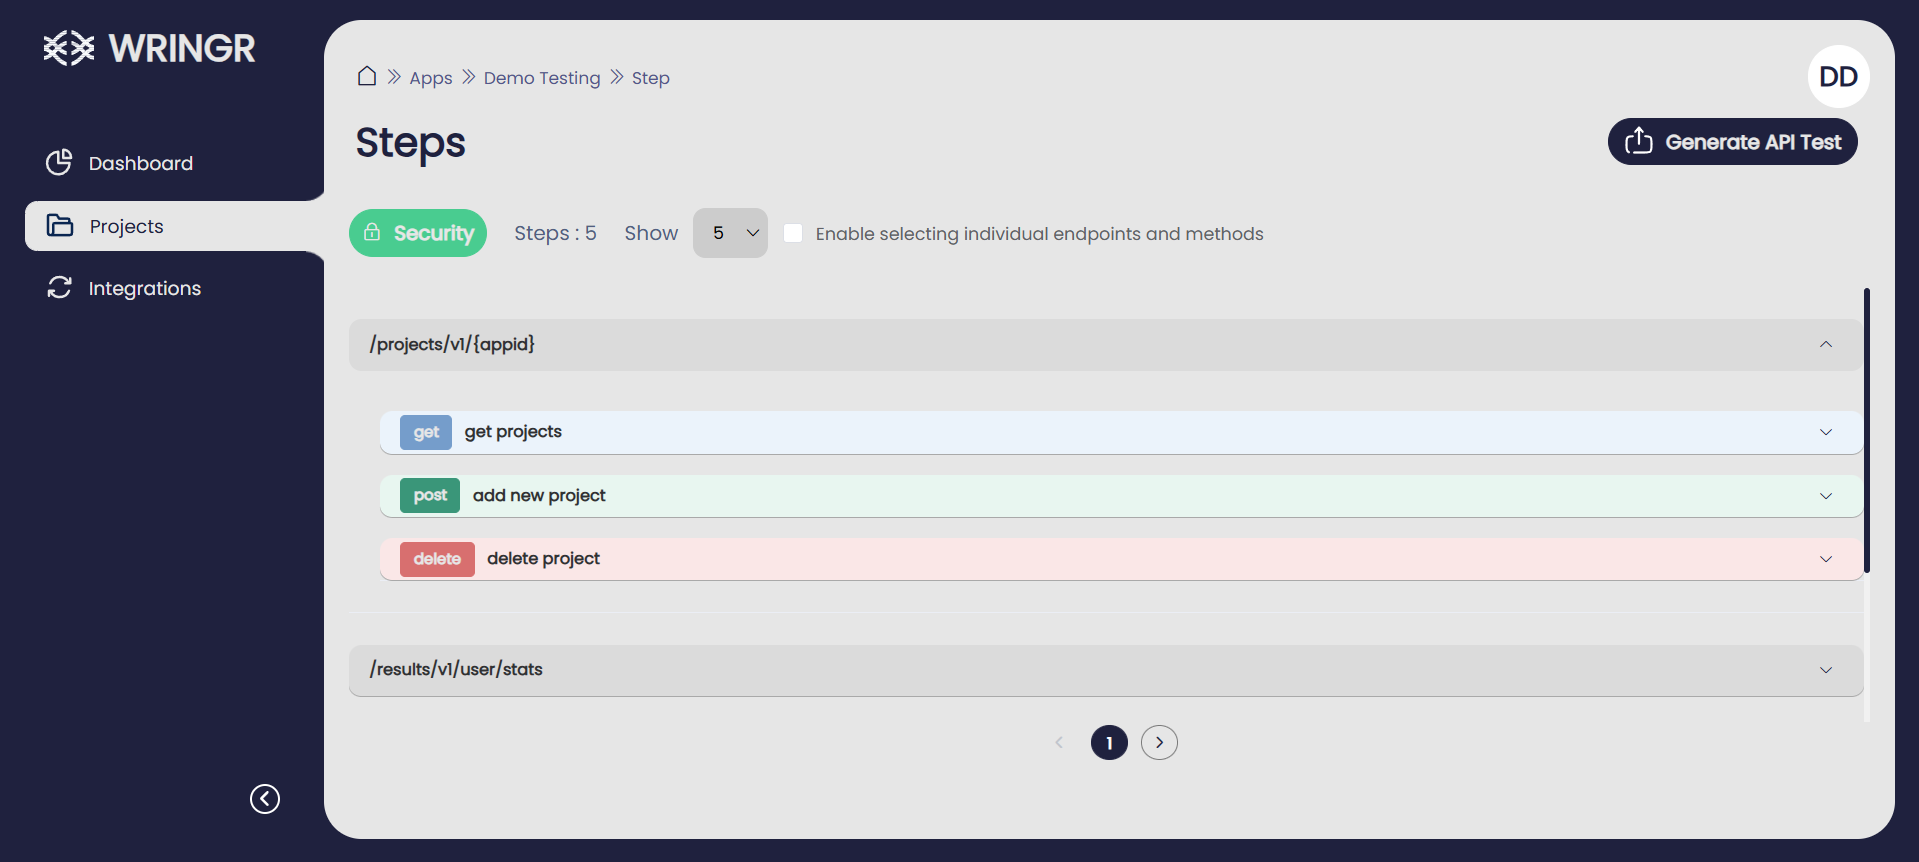
- Click on "Add Parameters"
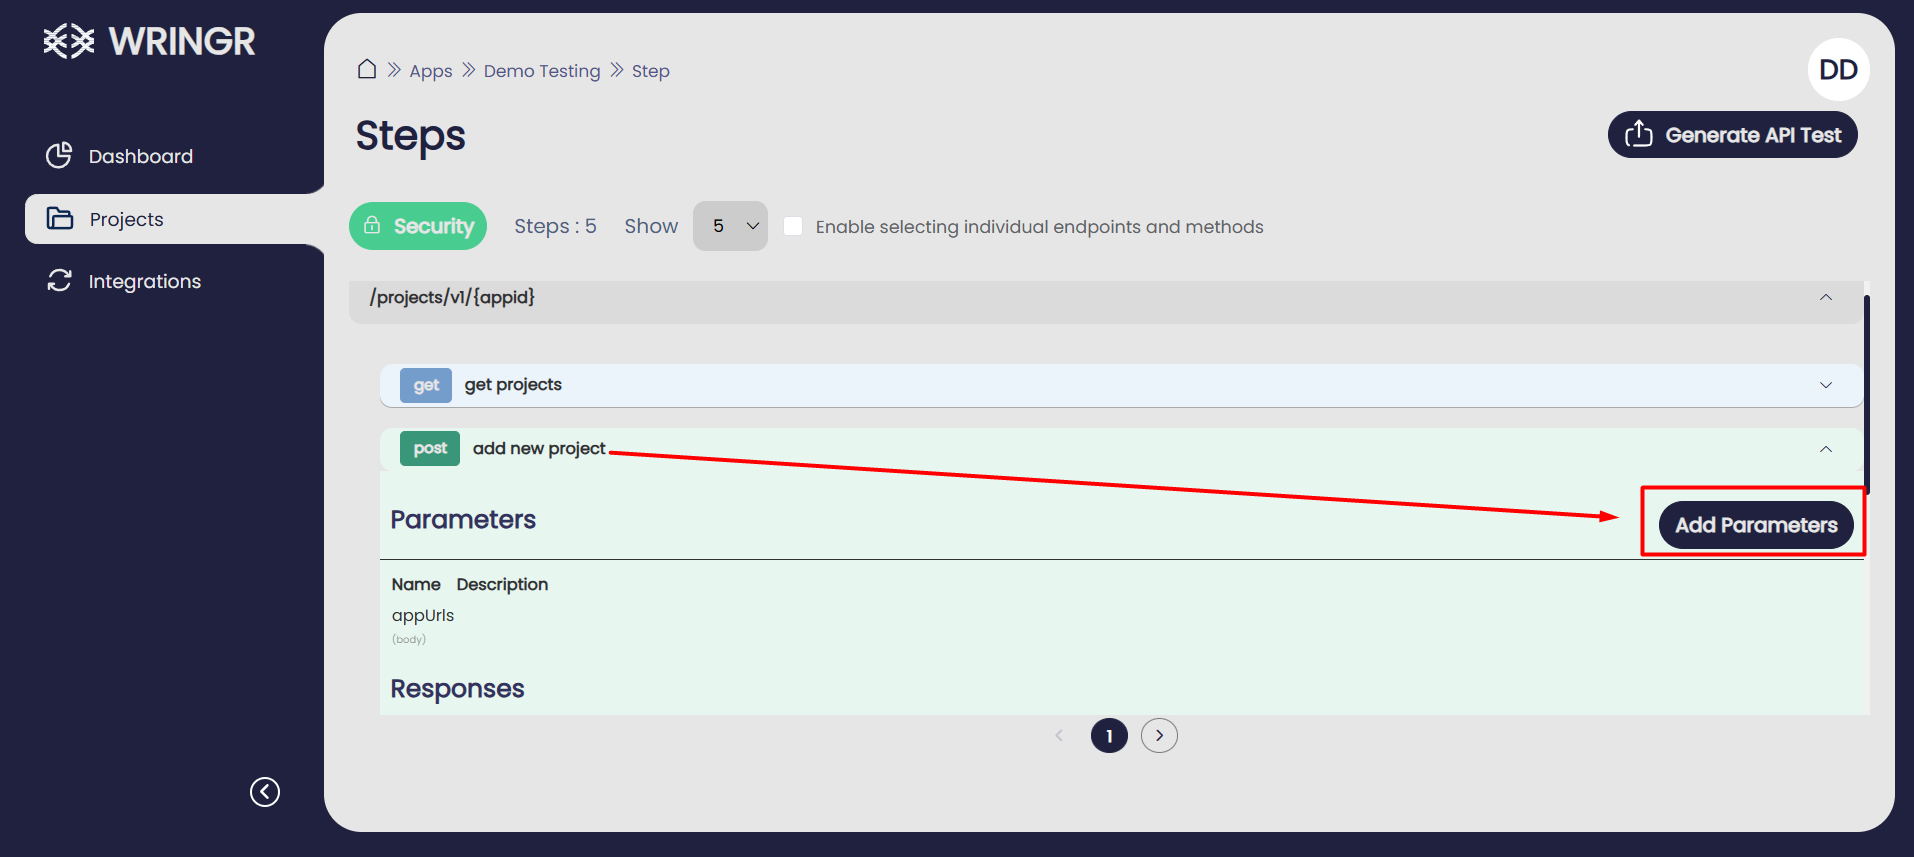
- You can either upload a JSON file containing the parameters or enter them manually.
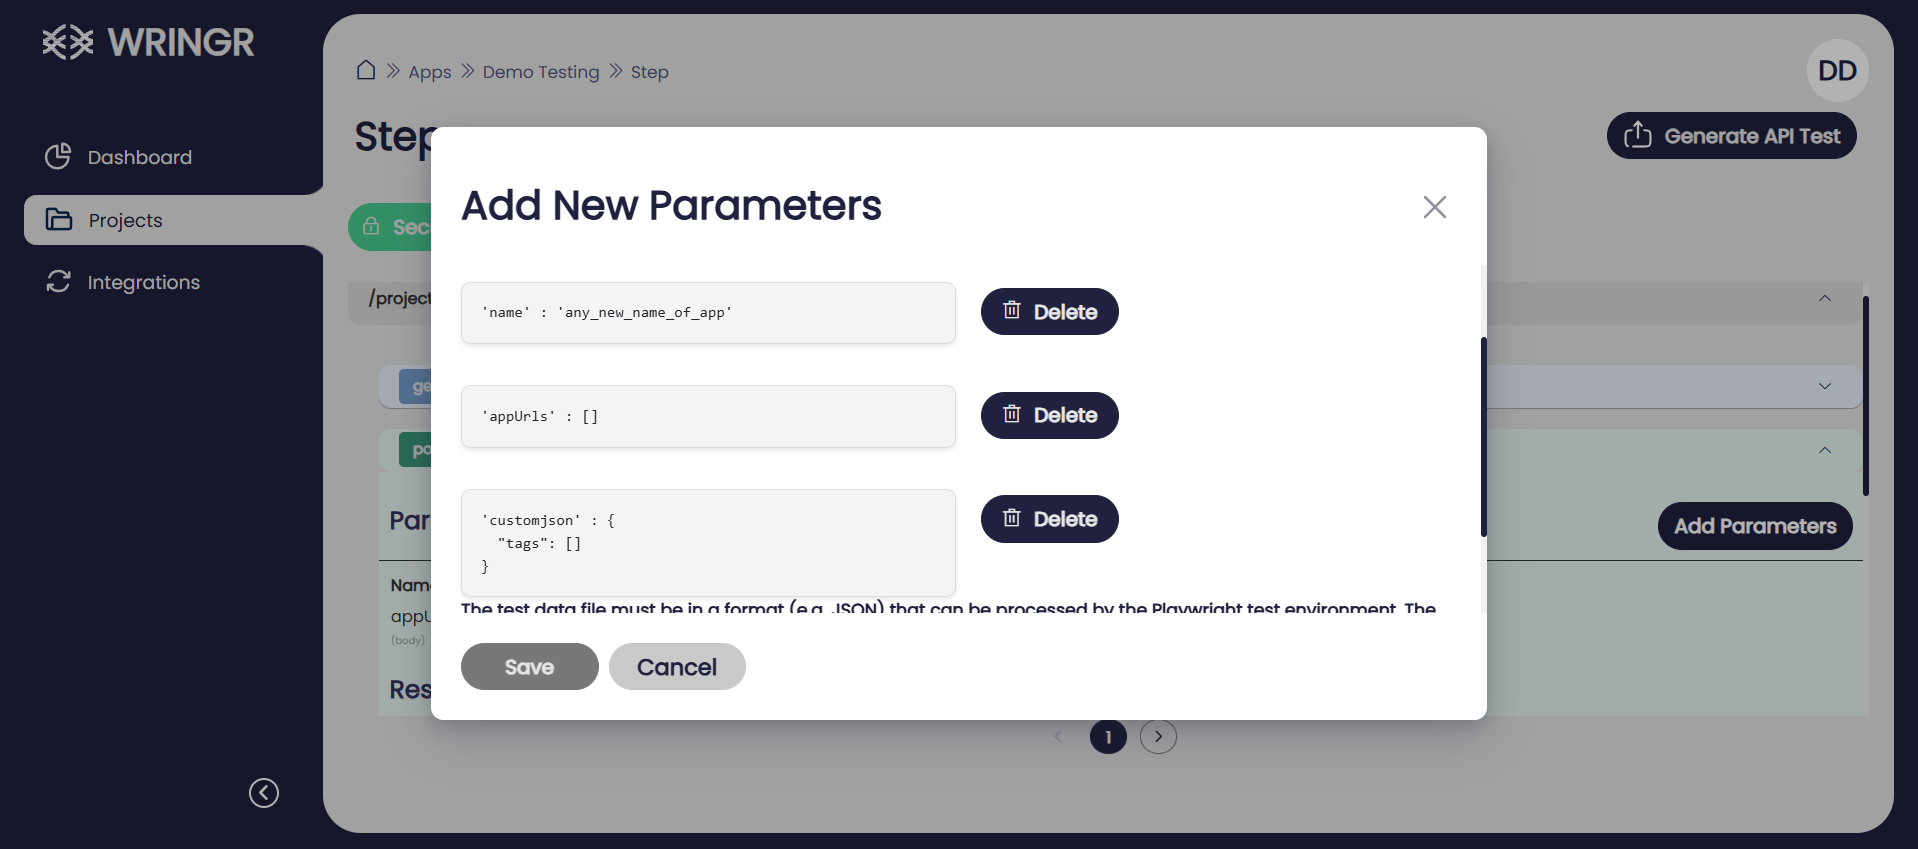
{
    "expect_status":200,
    "params":{
        "appUrls": [],
        "customjson":{"tags":[]},
        "name":"any_new_name_of_app"
    }

}
Here is how it looks after uploading
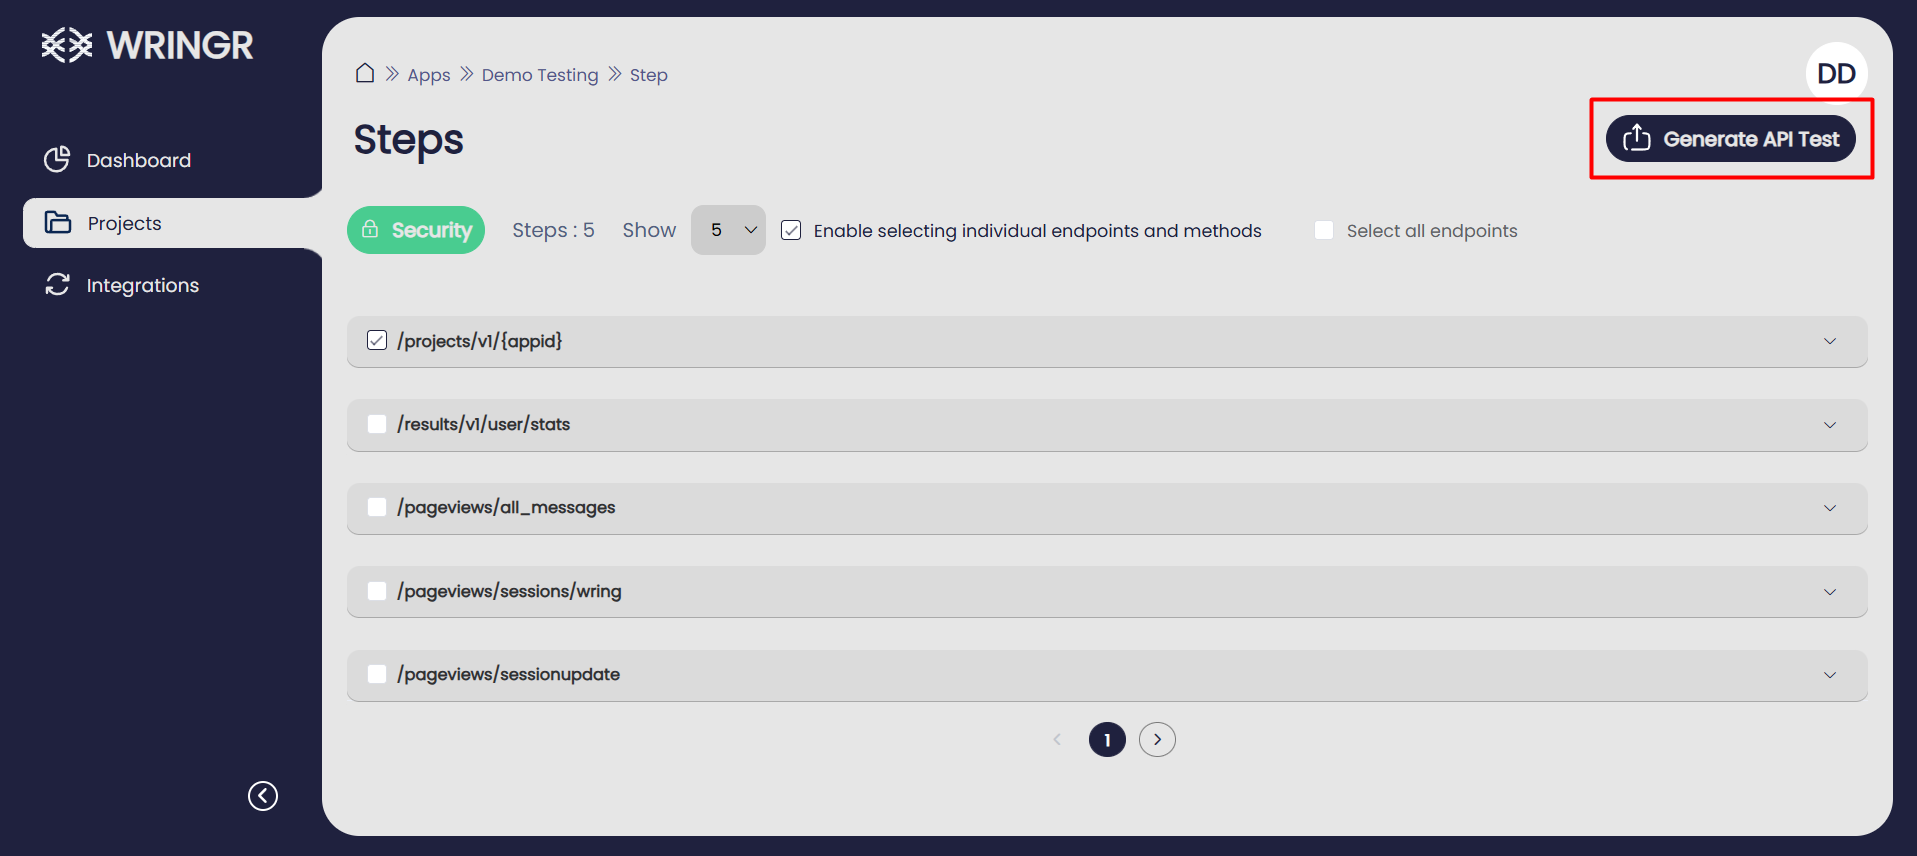
- Now go
Enable selecting individual endpoints and methodsand select which endpoints you want to run.

- Click
Generate API Test
Execution Process
To execute the steps for testing a project, follow the instructions below for setting up and running the tests in your terminal:
Download the Zip File First, download the zip file containing the project. You can obtain it from the provided link.
Extract the File Once you've downloaded the zip file, extract it to a desired directory on your system.
Navigate to the Project Directory
Open your terminal and navigate to the directory where you've extracted the zip file:
cd /path/to/extracted/folder
Replace /path/to/extracted/folder with the actual path to the extracted project directory.
- Install Dependencies
Next, install the required dependencies for the project. Run the following command in your terminal:
npm i
This will install all the necessary dependencies defined in the package.json file.
- Run Tests
Once the installation is complete, you can run the tests by executing:
npm test
This will run the tests and output the results in your terminal.
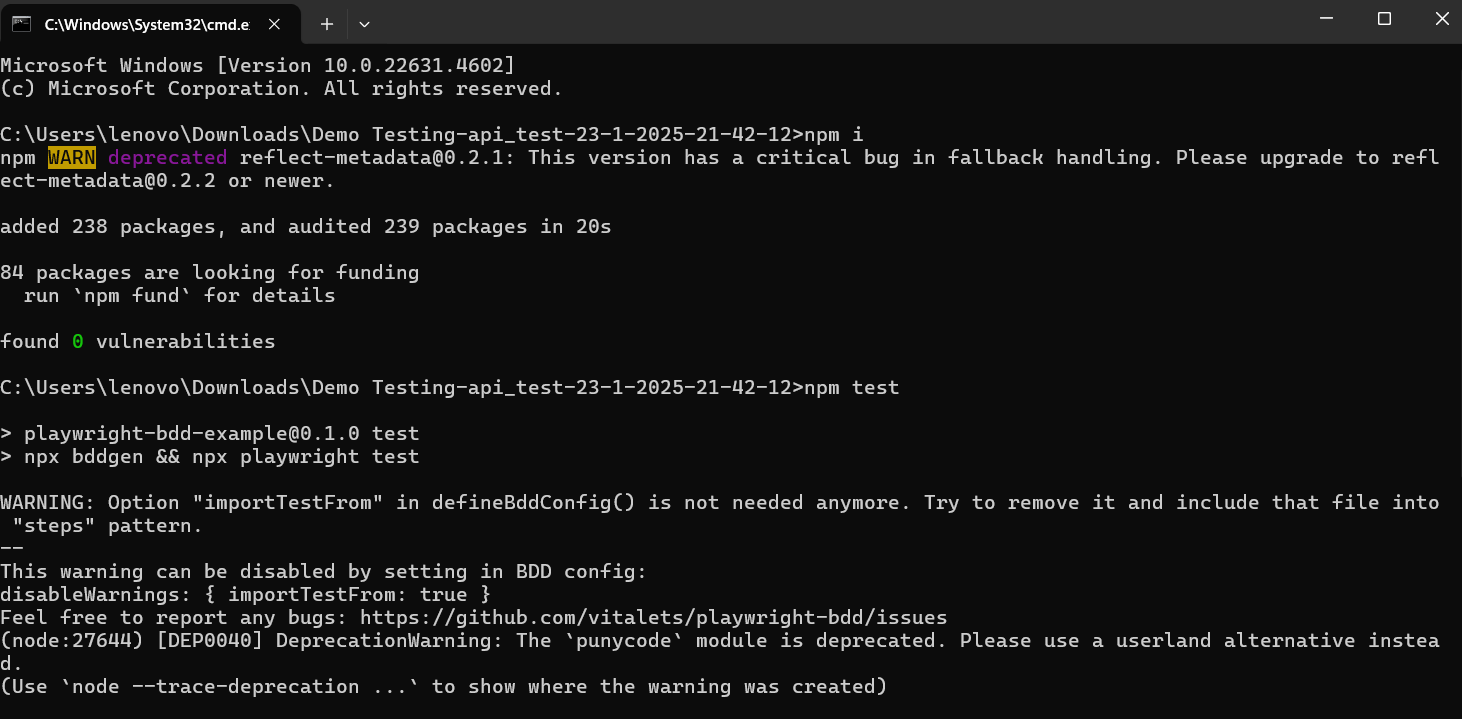
- Expected Output
After running the tests, you should see the test results, including any pass or fail messages, depending on the outcomes of your tests.
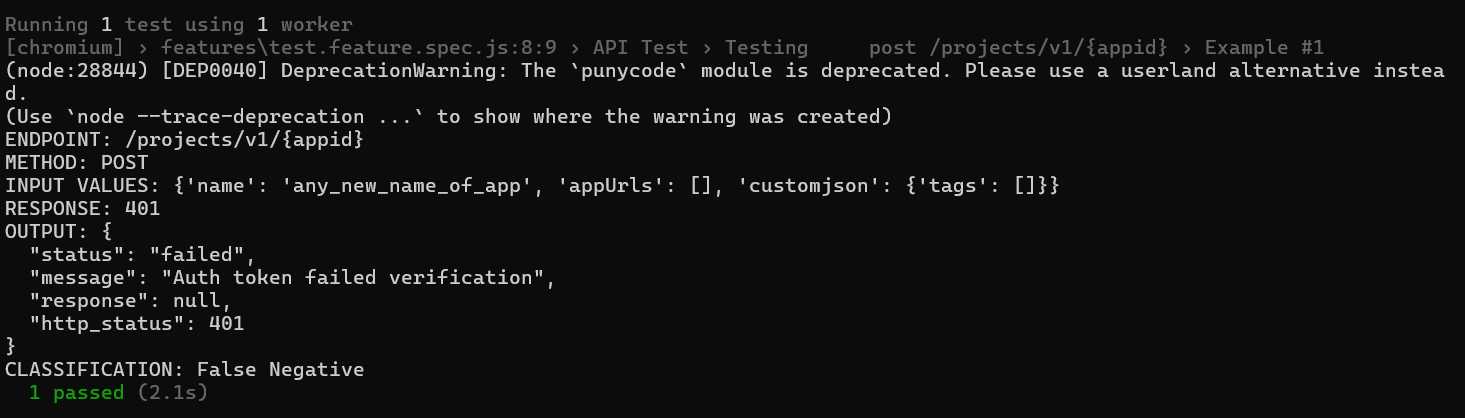
Example:
Additional Tips
- Keep in mind that all JSON must be well-formed and follow strict JSON syntax.
- When uploading parameters via a file, ensure the file extension and content are valid JSON.
- Always confirm the Content-Type header is set correctly, especially when sending JSON data.
- Use the Security section to set global headers so that they don’t have to be repeated for each endpoint.